The best way to protect your info from theft
If you carry sensitive information around on a USB drive, you should consider using encryption to secure the data in case of loss or theft. I’ve already talked about how to encrypt your hard drive using BitLocker for Windows or FileVault for Mac, both built-in operating system features.
For USB drives, there are a couple of ways you can go about using encryption on the drives: using BitLocker on Windows, buying a hardware encrypted USB drive from a third-party or using third-party encryption software.
In this article, I’m going to talk about all three methods and how you can implement them. Before we get into the details, it should be noted that no encryption solution is perfect and guaranteed. Unfortunately, all the solutions mentioned below have run into issues over the years.
Security holes and vulnerabilities have been found in BitLocker, third-party encryption software and a lot of hardware encrypted USB drives can be hacked. So is there any point to using encryption? Yes, definitely. Hacking and exploiting vulnerabilities is extremely hard and requires a lot of technical skill.
Secondly, security is always being improved and updates are made to software, firmware, etc to keep data secure. Whatever method you choose, make sure to always keep everything updated.
Method 1 – BitLocker on Windows
BitLocker will encrypt your USB drive and then require a password to be entered whenever it is connected to a PC. To get started using BitLocker, go ahead and connect your USB drive to your computer. Right-click on the drive and click on Turn on BitLocker.
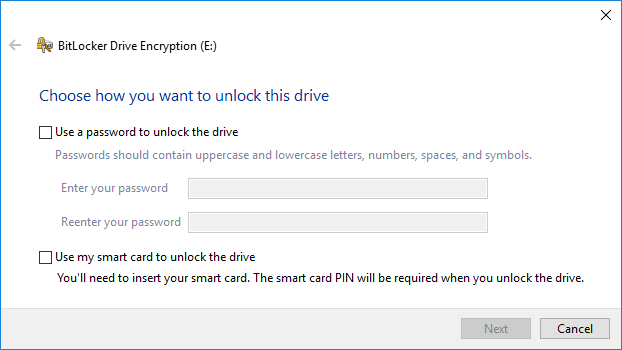
Next, you’ll have the option to pick how you want to unlock the drive. You can choose to use a password, use a smart card or use both. For most personal users, the password option will be the best choice.
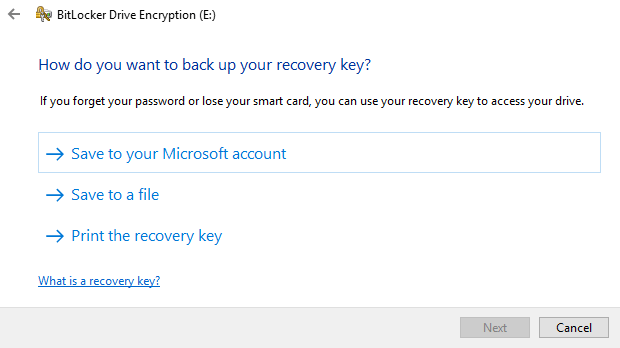
Next, you’ll need to choose how you want to save the recovery key in case the password is forgotten.
You can save it to your Microsoft Account, save to a file or print the recovery key. If you save it to your Microsoft Account, you’ll have a much easier time recovering your data later on since it’ll be stored on Microsoft servers. However, the downside is that if law enforcement ever wants your data, Microsoft will have to pony up your recovery key if served a warrant.
If you save it to a file, make sure that file is stored somewhere secure. If someone can easily find the recovery key, then they can access all of your data. You can save to a file or print the key and then store that in a bank lockbox or something very secure.
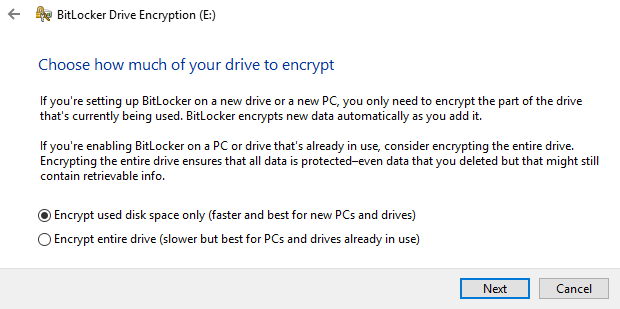
Next, you need to choose how much of the drive you want to encrypt. If it’s brand new, just encrypt the used space and it’ll encrypt the new data when you add it. If there is already something on it, then just encrypt the whole drive.
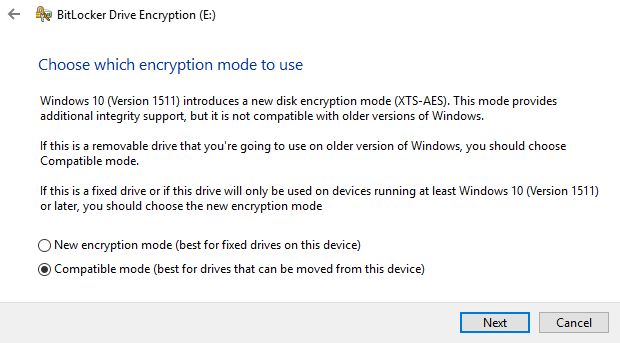
Depending on which version of Windows you are using, you may not see this screen. On Windows 10, you’ll be asked to choose between the new encryption mode or the compatible mode. Windows 10 has better and stronger encryption, which will not be compatible with earlier versions of Windows. If you want more security, go with the new mode, but if you need to connect the drive to older versions of Windows, go with compatible mode.
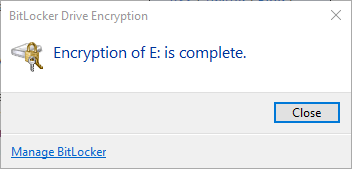
After this, it will begin to encrypt the drive. The time will depend on how big your drive is and how much data needs to be encrypted.
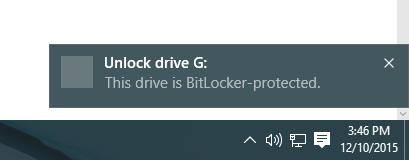
Now if you go to another Windows 10 machine and plug in the drive, you’ll see a little message appear in the notification area. In earlier versions of Windows, just go to Explorer.
You’ll also see the drive icon has a lock on it when you view the drives in Explorer.
Finally, when you double-click on the drive to access it, you will be prompted to enter the password. If you click More Options, you’ll also see the option for using the recovery key.
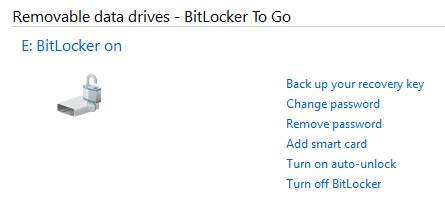
If you want to turn off BitLocker at a later point, just right-click on the drive and choose Manage BitLocker. Then click on Turn off BitLocker in the list of links.
You can also change the password, backup the recovery key again, add smart card verification and turn auto-lock on or off. Overall, it’s a simple and secure way to encrypt a flash drive that doesn’t require any third-party tools.
Method 2 – VeraCrypt
There is a lot of third-party data encryption software out there that claim they are safe and secure, but no audit has been done to ensure this so-called quality. When it comes to encryption, you need to be sure the code is being audited by teams of security professionals.
The only program I would recommend at this time would be VeraCrypt, which is based on the previously popular TrueCrypt. You can still download TrueCrypt 7.1a, which is the only recommend version to download, but it’s no longer being worked on. The code has been audited and thankfully no major security vulnerabilities have been found.
However, it does have some issues and therefore shouldn’t really be used anymore. VeraCrypt basically took TrueCrypt and fixed most of the issues that were found in the audit. To get started, download VeraCrypt and then install it on your system.
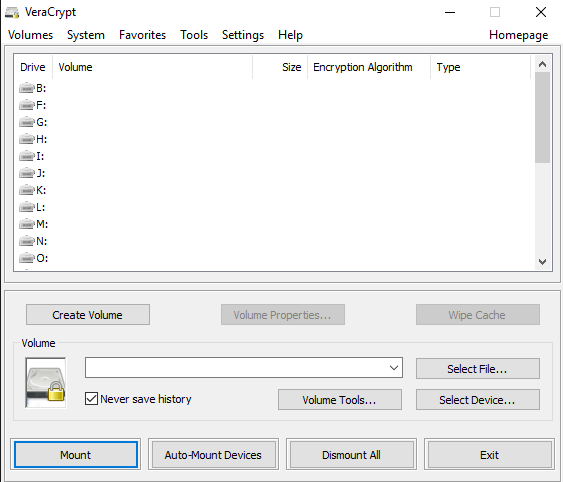
When you run the program, you’ll get a window with a bunch of drive letters and a few buttons. We want to start off by creating a new volume, so click on the Create Volume button.
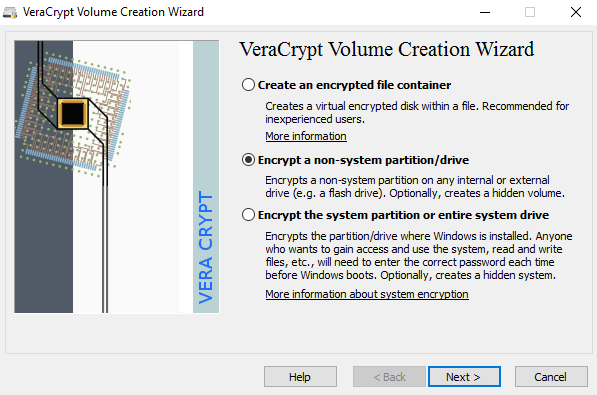
The volume creation wizard will popup and you’ll have a couple of options. You can choose to Create an encrypted file container or you can choose to Encrypt a non-system partition/drive. The first option will create a virtual encrypted disk stored in a single file. The second option will encrypt your entire USB flash drive. With the first option, you can have some data stored in the encrypted volume and the rest of the drive can contain unencrypted data.
Since I only store sensitive information on one USB drive, I always go with encrypting the entire drive option.
On the next screen, you have to choose between creating a Standard VeraCrypt volume or a Hidden VeraCrypt volume. Make sure to click on the link to understand in detail the difference. Basically, if you want something super secure, go with the hidden volume because it creates a second encrypted volume inside the first encrypted volume. You should store the real sensitive data in the second encrypted volume and some fake data in the first encrypted volume.
In this way, if someone forces you to give up your password, they will only see the contents of the first volume, not the second one. There is no extra complexity when accessing the hidden volume, you just have to enter a different password when you mount the drive, so I would suggest going with the hidden volume for extra security.
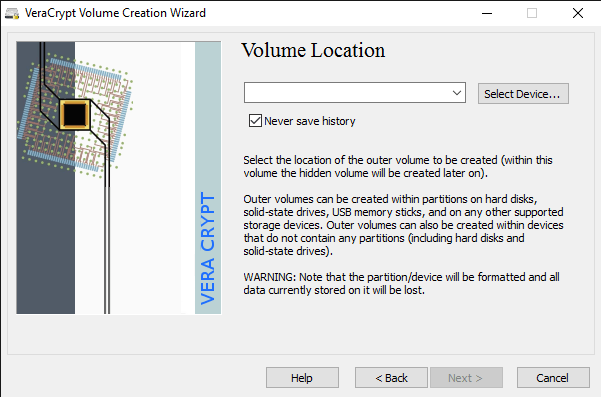
If you choose the hidden volume option, make sure to pick Normal mode on the next screen so that VeraCrypt creates the normal volume and hidden volume for you. Next, you have to choose the location of the volume.
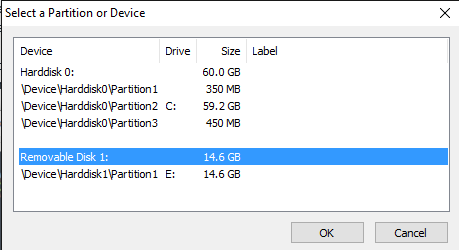
Click on the Select Device button and then look for your removable device. Note that you can choose a partition or the entire device. You might run into some issues here because trying to select Removable Disk 1 gave me an error message stating that encrypted volumes can only be created on devices that don’t contain partitions.
Since my USB stick only had one partition, I ended up just choosing the /Device/Harddisk/Partition1 E: and it worked fine. If you chose to create a hidden volume, the next screen will set the options for the outer volume.
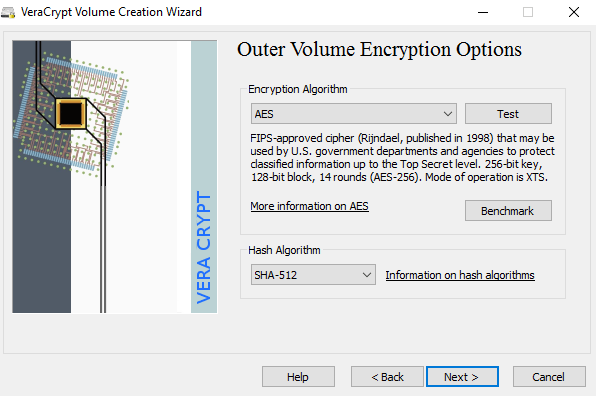
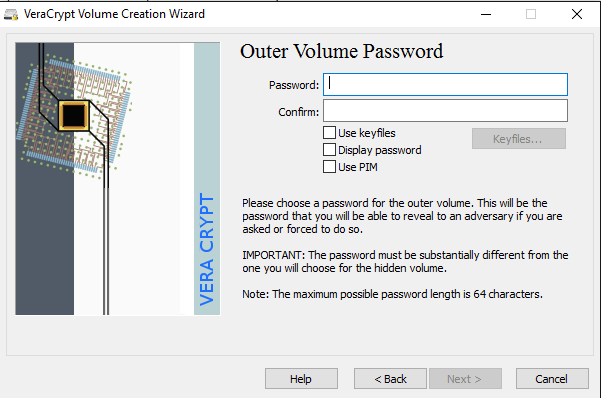
Here you have to choose the encryption algorithm and the hash algorithm. If you have no idea what anything means, just leave it at the default and click Next. The next screen will set the size of the outer volume, which will be the same size as the partition. At this point, you have to enter an outer volume password.
Note that the passwords for the outer volume and hidden volume have to be very different, so think of some good, long and strong passwords. On the next screen, you have to choose whether you want to support large files or not. They recommend no, so only choose yes if you really need to store files larger than 4GB on the drive.
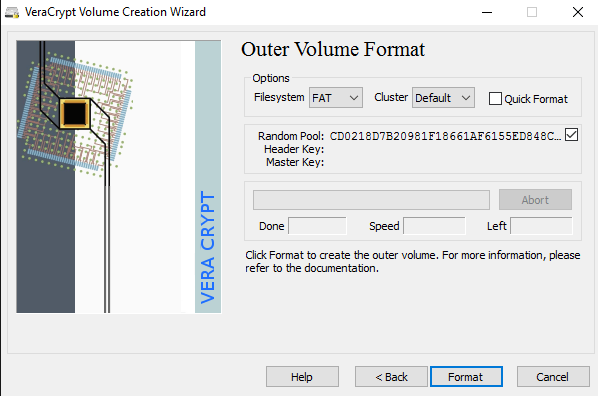
Next, you have to format the outer volume and I would recommend not changing any of the settings here. The FAT filesystem is better for VeraCrypt. Click the Format button and it will delete everything on the drive and then start the creation process for the outer volume.
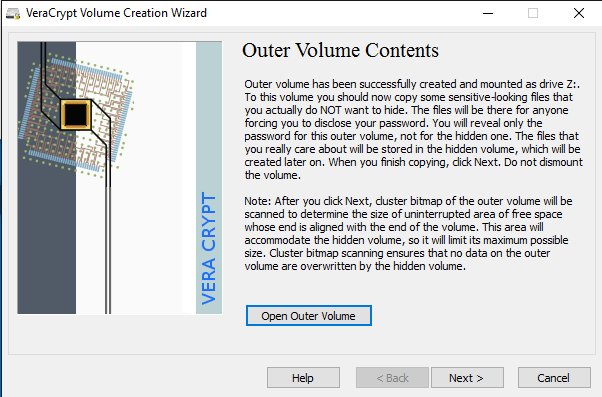
This will take some time because this format actually writes random data over the entire drive as opposed to the quick format that normally occurs in Windows. Once complete, you’ll be asked to go ahead and copy data to the outer volume. This is supposed to be your fake sensitive data.
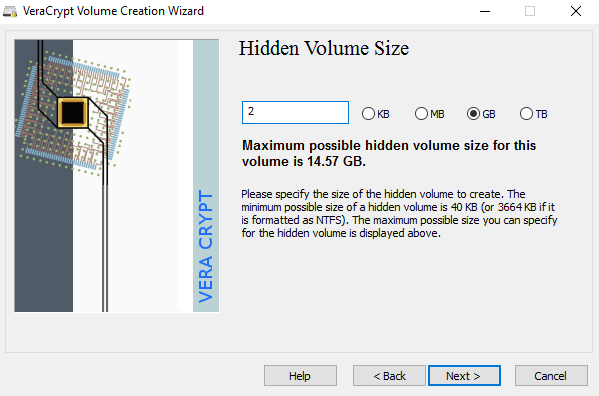
After you copy the data over, you’ll now start the process for the hidden volume. Here you have to choose the type of encryption again, which I would leave alone unless you know what all that means. Click Next and you now have the ability to choose the size of the hidden volume. If you’re sure you’re not going to add anything else to the outer volume, you can just max the hidden volume out.
However, you can make the size of the hidden volume smaller too if you like. That will give you more room in the outer volume.
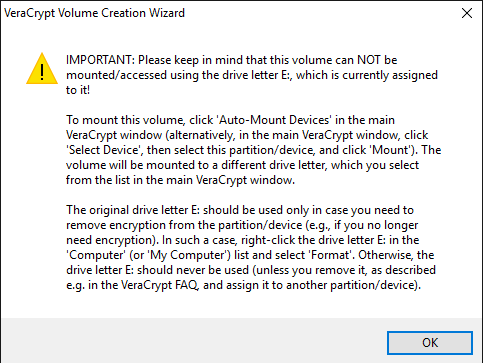
Next, you have to give your hidden volume a password and then click Format on the next screen to create the hidden volume. Finally, you’ll get a message telling you how to access the hidden volume.
Note that the only way to access the drive now is by using VeraCrypt. If you try to click on the drive letter in Windows, you’ll just get an error message saying the drive cannot be recognized and needs to be formatted. Don’t so that unless you want to lose all your encrypted data!
Instead, open VeraCrypt and first choose a drive letter from the list at the top. Then click on Select Device and choose the removable disk partition from the list. Lastly, click the Mount button. Here you will be asked to enter the password. If you enter the outer volume password, that volume will be mounted to the new drive letter. If you enter the hidden volume password, then that volume will be loaded.
Pretty cool right!? Now you have a super secure software encrypted USB flash drive that will be impossible for anyone to access.
Method 3 – Hardware Encrypted USB Flash Drives
Your third option is to buy a hardware encrypted USB flash drive. Never buy a software encrypted flash drive because it is probably using some proprietary encryption algorithm created by the company and has a much higher chance of being hacked into.
Even though method 1 and 2 are great, they are still software encryption solutions, which are not as ideal as a hardware based solution. Hardware encryption allows for faster access to the data on the drive, prevents pre-boot attacks and stores the encryption keys on a chip, removing the need for externally stored recovery keys.
When you buy a hardware encrypted device, make sure it is using AES-256 bit or is FIPS-compliant. My main recommendation in terms of trustworthy companies is IronKey.
They’ve been in the business for a very long time and have some really high security products for consumers all the way to enterprises. If you really need some secure flash drives and don’t want to do it yourself, then this is the best choice. It’s not cheap, but at least you can feel good that your data is stored securely.
You’ll see a whole bunch of cheap options on sites like Amazon, but if you read the reviews, you’ll always find people who were “shocked” when something happened and they were able to access the data without typing in their password or something similar.
Hopefully, this in-depth article gives you a good idea of how you can encrypt data on a flash drive and access it securely. If you have any questions, feel free to comment. Enjoy!


