In the wrong hands, your data could be exploited in evil ways
Securing computer data through encryption software has become a clear necessity for many businesses and individuals carrying sensitive information on their laptops or USB flash drives. Unfortunately, many people do not encrypt their data because they’re too lazy or feel data theft won’t happen them. A lot of people simply feel they don’t have anything all that important stored on their computer and therefore they don’t need encryption.
Whatever your reason may be, encrypting your data is very important. Whether you think you store important data on your computer or not, there are hackers out there who would love to browse through your files, pictures, and data to do harm like identity theft. Even something as innocuous as pictures can be used in very evil ways if in the wrong hands.
Encrypting your hard drive in Windows and OS X is now a fairly simple and straight-forward process that pretty much anyone can do, so there’s no reason to leave yourself open to possible attacks. In this article, I’ll go through using BitLocker on Windows and FileVault on OS X to encrypt your data.
Previously, I had written about using a program called TrueCrypt, but it seems the project has been discontinued for various reasons. The program had been one of the most popular for encrypting your hard drive, but now that it is no longer supported, we don’t recommend using it. The TrueCrypt team even recommends using BitLocker as it can do pretty much everything TrueCrypt was able to do.
Bitlocker on Windows
In Windows Vista, Windows 7 and Windows 8, you can turn on drive encryption by enabling BitLocker. Before we get into how to enable BitLocker, there are a couple of things you should know first:
1. BitLocker works on the Ultimate and Enterprise versions of Windows Vista and Windows 7 and on the Pro and Enterprise versions of Windows 8 and Windows 8.1.
2. There are three authentication mechanisms in BitLocker: TPM (Trusted Platform Module), PIN, and USB key. For the greatest security, you want to use TPM plus a PIN. The PIN is a password that has to be entered by the user before the booting process.
3. Older computers that don’t support TMP can only use the USB key authentication mechanism. This is not as secure as using TPM with a PIN or TPM with a USB key or TPM with both a PIN and a USB key.
4. Never print a backup key on paper and store it somewhere. If someone, even the police, can get access to that paper, they can decrypt your entire hard drive.
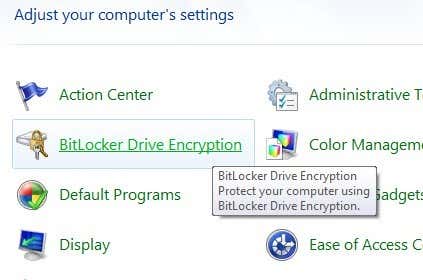
Now let’s talk about actually enabling BitLocker. Open the Control Panel in Windows and click on BitLocker Drive Encryption.
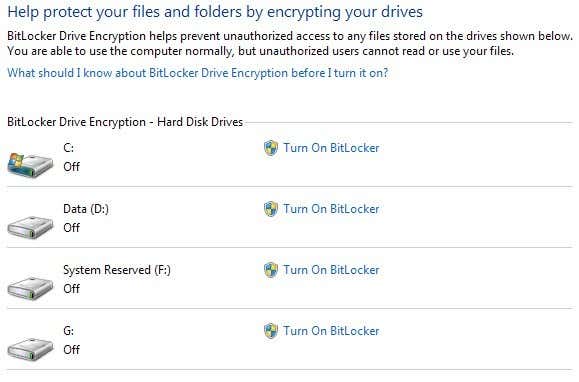
You’ll see a list of all your partitions and drives listed on the main screen. To get started, all you have to do is click on Turn On BitLocker.
If you have a newer computer with a processor that supports TPM, you’re good to go and the process will start. If not, you’ll get the following error message: “A compatible Trusted Platform Module (TPM) Security Device must be present on this computer, but a TPM was not found.”
Once you’ve followed the directions in that post, you should be able to click on Turn On BitLocker again and the error message should not appear. Instead, the BitLocker Drive Encryption setup will start.
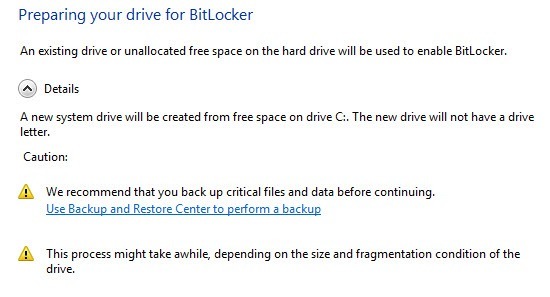
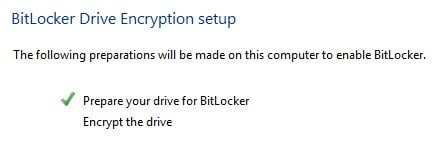
Go ahead and click Next to get started. The setup basically prepares your drive and then encrypts it. To prepare the drive, Windows needs two partitions: one small System partition and one operating system partition. It will tell you this before it begins.
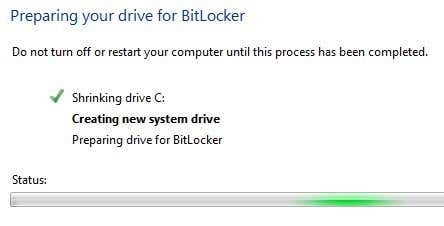
You might have to wait for a few minutes while the C drive is first shrunken down and the new partition is created. After it is finished, you’ll be asked to restart your computer. Go ahead and do that.
Once Windows restarts, the BitLocker setup should pop up automatically with a check mark next to drive setup. Click Next to start the actual hard drive encryption.
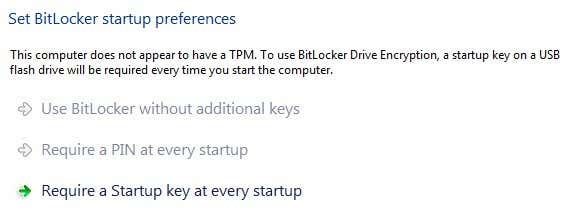
On the next screen, you’ll get to choose your BitLocker security options. If you don’t have a TPM installed, you won’t be able to use a PIN for startup, but only a USB key.
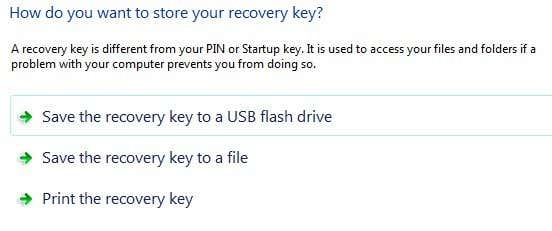
You’ll be asked to insert a USB stick at which point it will save the startup key there. Next you’ll need to also create a recovery key. You can save it to a USB drive, to a file or print it. It’s best not to print it.
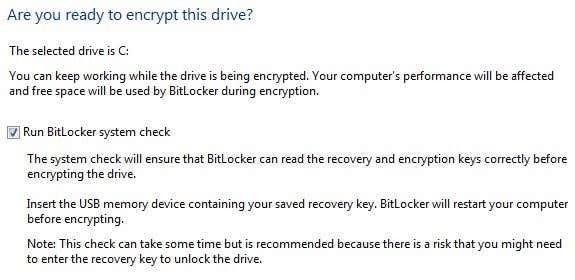
After this, you’ll finally be asked if you’re ready to encrypt the hard drive, which will require a restart.
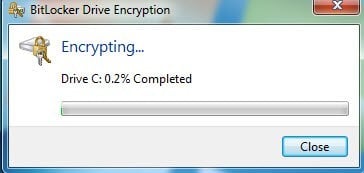
If all goes well and Windows is able to read the encryption keys off your USB stick or from the TPM, then you should see a dialog pop up telling you that the drive is being encrypted.
Once completed, your data is now safely encrypted and cannot be accessed without your keys. Again, it’s important to note that using BitLocker without TPM is a lot less secure and even if you use TPM, you need to use it with a PIN or with a USB key or with both to be truly protected.
Also, it’s worthwhile to note that while you are logged in, the keys are stored in RAM memory. If you put your computer to sleep, the keys could be stolen by savvy hackers, so you should always shutdown your computer when you’re not using it. Now let’s talk about FileVault in OS X.
FileVault in OS X
FileVault in OS X provides the same functionality as BitLocker does in Windows. You can encrypt the entire drive and a separate boot volume is created to store user authentication information unencrypted.
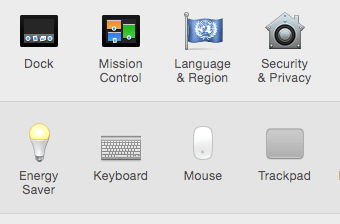
To use FileVault, you need to go to System Preferences and click on Security & Privacy.
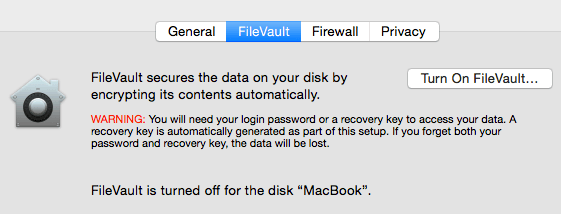
Now click on the FileVault tab and click on the Turn On FileVault button. If the button is disabled, you have to click the little yellow lock at the bottom left of the dialog and enter your system password in order to make changes.
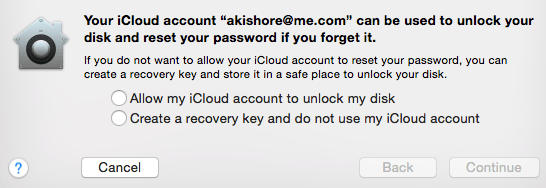
Now you will be asked where you want to store your recovery key. You can either store it in iCloud or you can get a recovery key code and then store it in a safe place. I would highly recommend against using iCloud, even though that is easier, because if law enforcement or a hacker needs to break into your computer, all they have to do is get access to your iCloud account to remove the encryption.
Now you’ll be asked to restart your computer and when OS X logs back in, the encryption process will begin. You can go back into Security and Privacy to see the progress of the encryption. You should expect the computer performance to be slightly impacted in the range of 5 to 10% slower. If you have a new MacBook, the impact may be less.
As mentioned earlier, all full-disk encryption can still be hacked because the keys get stored in RAM while you’re logged in. You must always shut down the computer instead of putting it to sleep and you should always disable automatic login. In addition, if you use a pre-boot PIN or password, you’ll have the most security and it will be extremely difficult for even technical forensic experts to crack into your hard drive. Have any questions, post a comment. Enjoy!

