Create a batch file and then schedule it to run
Earlier I wrote about a program called DropIt that automatically moves or copies files for you when new files appear inside a folder. This can be useful, for example, if you have limited space on a local hard drive and want to move all your downloads off to an external storage device.
If you want to automatically delete files, there are two ways you can go about it in Windows. The first method involves downloading a freeware app called AutoDelete that lets you configure a schedule for deleting files in a particular folder. I’ve already written two detailed guides on using the program (here and here), so check those out if you prefer a freeware program to get the job done.
The second method for deleting files is to create a batch file and then schedule that batch file to run. You can do all of that without installing any third-party software. In this article, I’ll walk you through the steps for creating a batch file and then using Task Scheduler to have the script run on a reoccurring basis.
Step 1 – Create Batch File
If creating a batch file sounds a bit scary or too technical, don’t worry because you don’t have to know what any of that means. I’ll explain what you need to copy and paste, where and what options you can change. First, open Notepad and copy and paste the following line of text:
forfiles -p "C:Test" -s -m *.* /D -5 /C "cmd /c del @path"
The line above probably makes no sense, which is perfectly fine as I’ll explain it down below. Basically, it tells Windows to delete all files in the C:Test folder and sub-folders that are older than 5 days. Here is what your Notepad file should look like.
Before we get into more details about the command, let’s save the file and give it a test run. First, create a folder on your computer called Test at the root of the C drive. Next, click File – Save and save the file as a batch file. To do that, type in a name followed by .bat and then change the Save as type dropdown to All Files.
Note that you can save the file to whichever location on the hard drive you like, it doesn’t really matter. Now create some dummy files in the Test folder and then double click on the Delete.bat file to run it. Anything get deleted? Probably not!
The reason why nothing was deleted is because the command has /D -5, which means files that are 5 days or older. In order to delete any file regardless of when it was created, you can either change the -5 to -0 or you can remove the /D -5 part altogether. Now if you run it, all the files will be deleted.
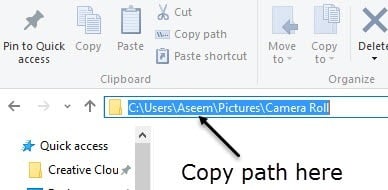
To customize the command, the first thing you can do is change the directory to something other than C:Test. That’s as simple as copying the path from Windows Explorer for the directory you want and pasting it into the command in Notepad.
Next is the -s parameter that you see after the directory path. This indicates that the command should look into all sub-folders also. If you do not want to delete files from subfolders, go ahead and remove the -s parameter.
Next is -m followed by *.*, which means that the command should evaluate files of every kind. If you only want to delete a specific file type in a folder, like PDF files or JPG images, just change *.* to *.pdf or *.jpeg and it will only remove those files.
The /D -X part we already talked about in terms of how old the files have to be in order to qualify for deletion. You can either keep it with a value greater than 1, set it to 0, or remove it altogether. That’s about all we need to know about the command.
There are a few things to note about running this command. Firstly, when files are deleted, they do not go to the Recycle Bin, but instead are deleted permanently, so be careful when using it. Secondly, the command only deletes files, not folders.
Since this is a batch file, you could also add multiples versions of this command in the same file. For example, here I am creating a batch file that will delete all DOCX files older than 180 days, all PDF files older than 60 days and all TXT files regardless of how old the files are.
Step 2 – Schedule Batch File
Now that you have your batch file created and saved, let’s go ahead and schedule it to run on a reoccurring basis. To do this, we have to open up Task Scheduler.
Luckily, I’ve already written an article on how to schedule a batch file, so open that page to get started. Scroll down to the Schedule Batch File on PC Startup section and follow along.
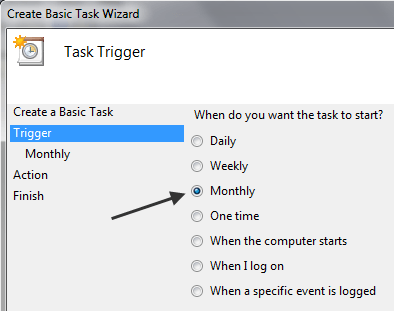
The only thing you have to change is the Trigger. You can choose from Daily, Weekly, Monthly, When the computer starts, When I log on or When a specific event is logged.
When you pick something like Weekly or Monthly and click Next, you’ll get a new screen where you can configure the exact time and days you want the script to run.
Hopefully, this is a good solution for most people who need to perform some simple automated tasks for deleting files on their PCs. If you have any questions, feel free to post a comment. Enjoy!


