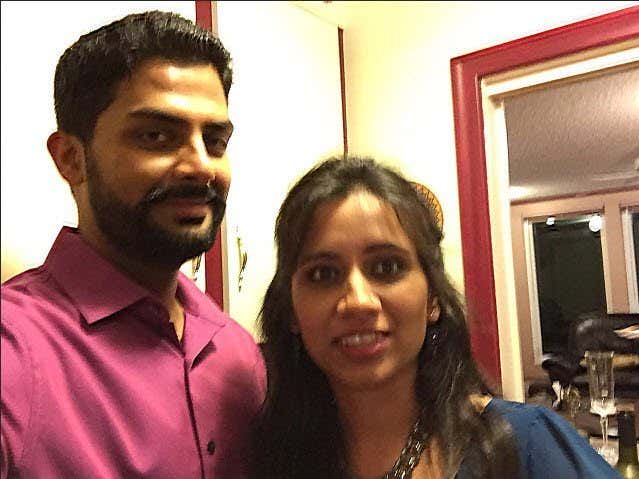
If this doesn't work, you probably need glasses
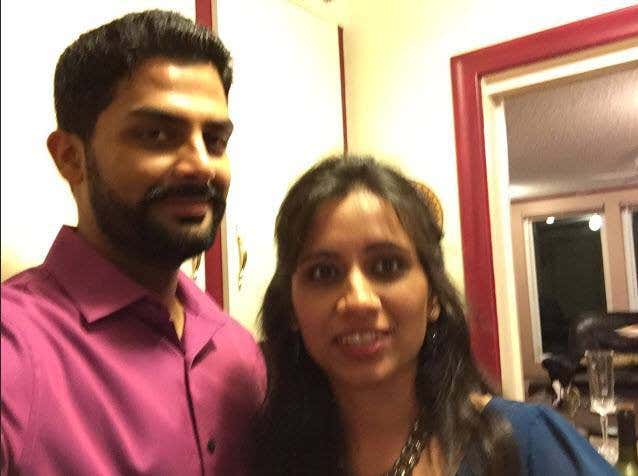
Unless you are a professional photographer, there are many times when a great picture is ruined because it’s blurry! Whether it’s because something was moving really fast or because of camera shaking, a blurry picture is pretty useless.
However, there are many times when you simply cannot recreate the moment caught in that blurry picture and making it clearer or sharpening the image is worth a shot. Luckily, there are a ton of tools that can be used to fix this problem.
Picture enhancement software programs like Adobe Photoshop have excellent tools to help make blurry pictures sharp, but aren’t free. In this post, I am going to talk about a couple of methods in Photoshop that can help you unblur a photograph. If the picture is really important to you, then Photoshop will give you the best results.
In addition, I’ll also mention a couple of other programs you can use in case you don’t have Adobe Photoshop installed on your machine. Skip down to past method 1 and 2 if you are interested in the other programs. The other programs I mention are also not free because I found that all free photo editing programs basically have a single sharpen option, which almost always perform terribly.
The programs below are specifically designed with custom algorithms to create sharper images with the least amount of degradation.
Photoshop Method 1 – Using an Extra Layer
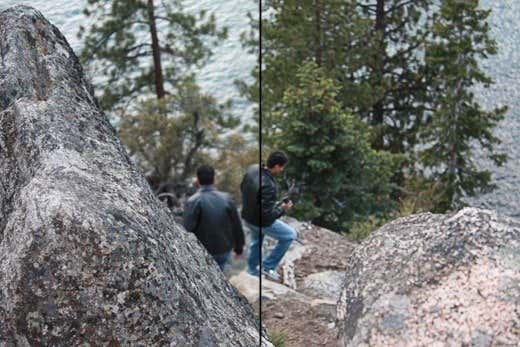
This method is fairly simple and works very well for sharpening images. For example, take a look at this photo with one side blurred and the other sharpened.
Take a look at the right side (sharpened) and the left side. Can you see the difference in the trees and in the person walking down? Here’s how to do it.
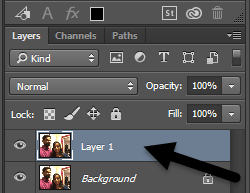
First, open the image in Photoshop and press CTRL + J to duplicate the background layer. Make sure to click on Layer 1 in the Layers panel.
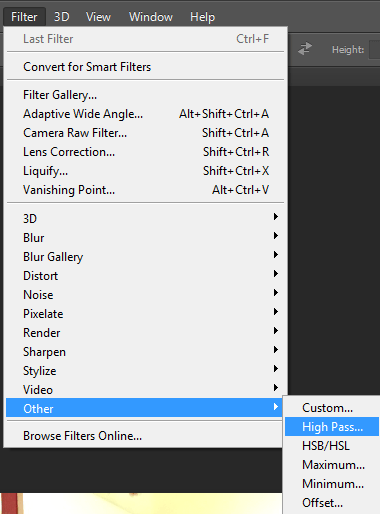
Next, go to Filter, then Other, and choose High Pass. The higher the value you set it to, the sharper your image will become. However, if you set it really high, the image will become grainy. I set mine to 10 pixels.
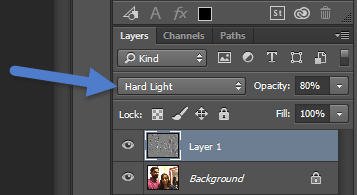
Don’t worry if your image looks like dark charcoal has been thrown all over it, we haven’t finished yet! With the new layer still selected, set the blending mode to Hard Light and adjust the Opacity to whatever you think makes the image look best. It’s set to 100% by default, but you may get better results at 50% or something else, so just play around with that value.
That’s it! Your image should now be much sharper looking! Unfortunately, if your image is very blurry or the blurriness is caused by really fast motion, you probably won’t see any major difference.
The best results are when the image is simply out of focus because the camera focused on the wrong object or something similar. Here is the before and after image that I tested using this method:
Photoshop Method 2 – Shake Reduction Filter
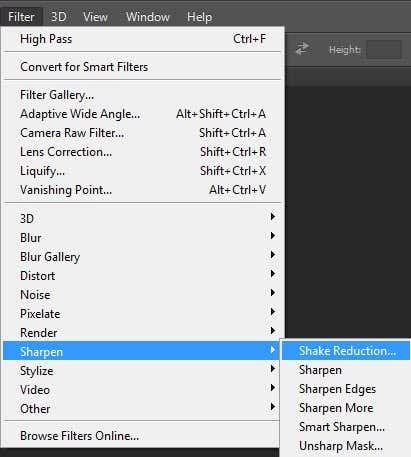
The above method was the simple way to sharpen a photo in Photoshop. The advanced method is to use the new Shake Reduction Filter. To start using this filter, go ahead and click on Filter, then Sharpen and then Shake Reduction.
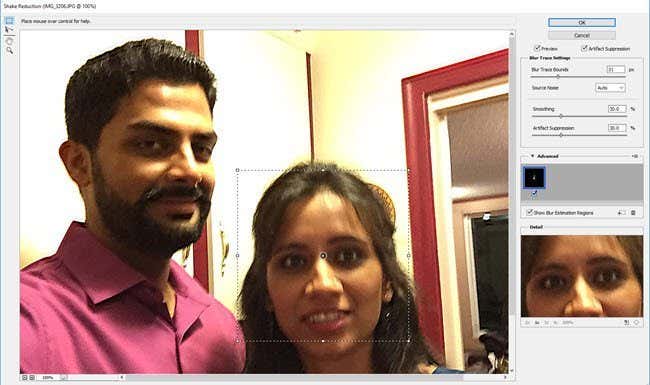
A window will pop up with the image on the left with a few options on the right. Photoshop will automatically try to figure out which part of the image to look at in order to correct the blur. You’ll see this section on the image as dotted lines.
This is called a blur trace and there is only one by default. The blur trace should ideally be part of the image that has the most edge contrast. So if one part of the image is bright and another part is dark, the blur trace should include the edge. In the above example, the default box is around her face, which is OK, but not ideal.
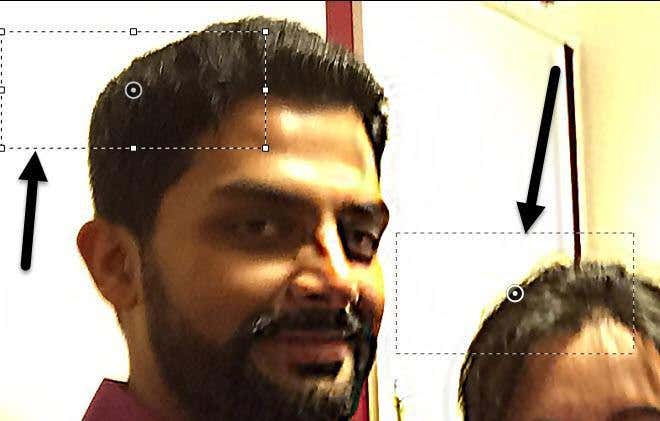
You can adjust the box by dragging the corners and changing the size. You can also click on the circle in the middle to move it around. If your image is really large, you can also create multiple blur traces in the case the blurring effect is different in different parts of the image. To create another blur trace, just click and drag to start drawing another box. I created two blur traces to see if the results would be better.
In my tests, I found that sometimes the default options resulted in better results than when I changed the blur traces. In other instances, I felt adjusting the blur traces made the images better, so you’ll have to really play around with all the options to get the best results.
Here is the final image from method 2, which I think looks a little better than the results from method 1. It’s obviously far from ideal, but blurry images can rarely be turned into crystal clear shots again.
Blurity
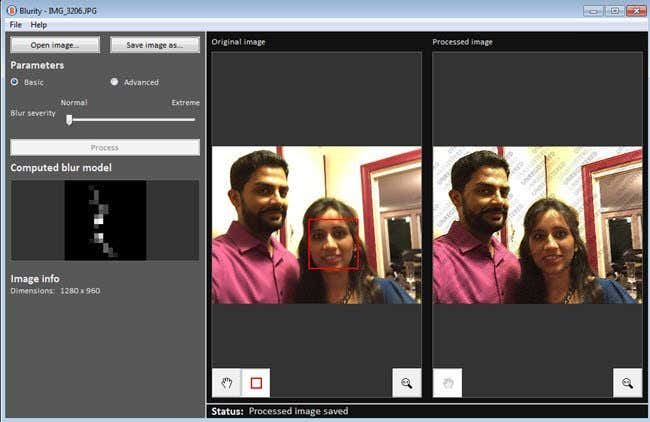
Blurity is a Windows or Mac program that is designed only for de-blurring photos. In my tests, it did an excellent job and I can see why they charge $79! It’s definitely only worth spending that much if the image really means a lot to you or if you have a lot of blurry photos you want to fix.
I also ran the program through VirusTotal and it came out clean, so you don’t have to worry about any spyware, etc. The only annoying thing about this program is that after you install it, it forces you to go through this tutorial that you MUST complete before you can actually start using the program.
Anyway, once you get past that, just click the Open Image button and then click anywhere on the image where there is a good instance of blur on a subject.
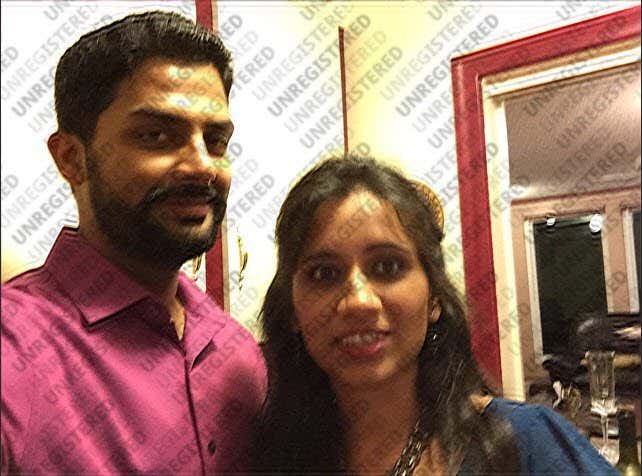
Once you select the region, just click on the Process button and it will generate a preview of the fixed blurred image. Here is the result on my test image with the watermark still on the image.
Discounting the watermark, the program actually does a very good job of correcting the blur in the image and it better since it costs a quite a bit. For good results and a slightly cheaper price, check out the program below.
SmartDeblur
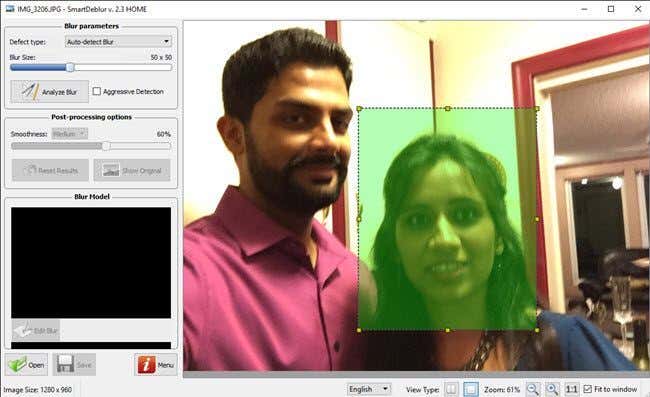
Another good program designed only for blurry photos is SmartDeblur. This one will set you back $49, but again, it does a very good job. Once you download and install the program, you have to click the Open button at the bottom to choose your image.
You can then adjust a couple of settings like Blur Size or the type of blue (Out of Focus blur or Gaussian blur), but I recommend just going with the defaults first to see what the program does. You can also select a region if you like or you can just click Analyze Blur and it will analyze the entire image.
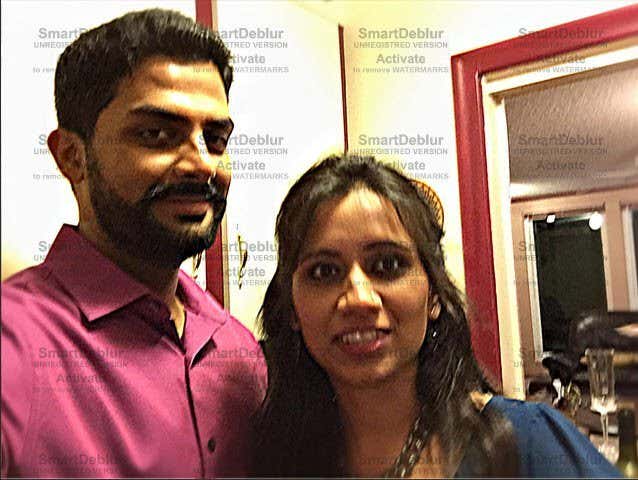
You might have to increase the smoothness option afterwards because I found the default settings make the image pretty grainy. Here is my result for the same test image using 100×100 for blur size and analyzing the whole image:
So there you have a couple of methods to correct blurry images using software. As I mentioned, all the free tools I tried performed terribly and that’s why I didn’t even bother mentioning them. If you have any questions or suggestions, feel free to comment. Enjoy!

