Makes establishing a remote connection easier
Usually, your network router assigns a dynamic IP address to your devices, including your Windows 10 and 11 PCs. If you need a static IP address for your PC, you either need to configure your router or change a settings option on your computer.
The good thing is there are multiple ways to assign a static IP address to your Windows PC. Depending on what you feel comfortable with, you can choose a method and proceed with it to acquire a fixed IP address for your machine.
Why Use a Static IP Address?
There are many reasons you need a static IP address. It’s possible you use a remote connection to connect to your PC. In this case, having a permanent IP address makes establishing the remote connection easier.
Similarly, if you use your PC for network file sharing, a static IP address ensures the other devices on your network can connect to your PC without any reconfigurations.
Assign a Static IP to Your Windows 11/10 PC Using Your Router
One way to get a static IP for your PC is by configuring your router to allocate a specified IP address to your machine. Most routers offer this option but how you configure the router is different for each router model.
Generally, you’d follow the following steps to configure a static IP for your PC on your network router.
Find Your Network Adapter’s MAC Address
For your router to identify your PC and assign it a specific IP address, you need to enter your network adapter’s (which is in your PC) unique MAC address on your router’s settings page.
So, let’s first find your network adapter’s MAC address:
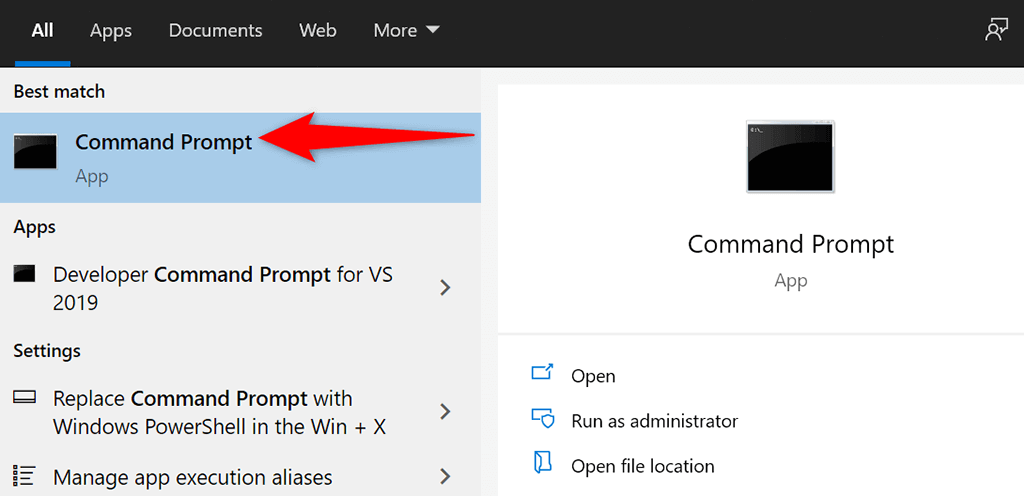
- Open the Start menu, search for Command Prompt, and select Command Prompt in the search results.
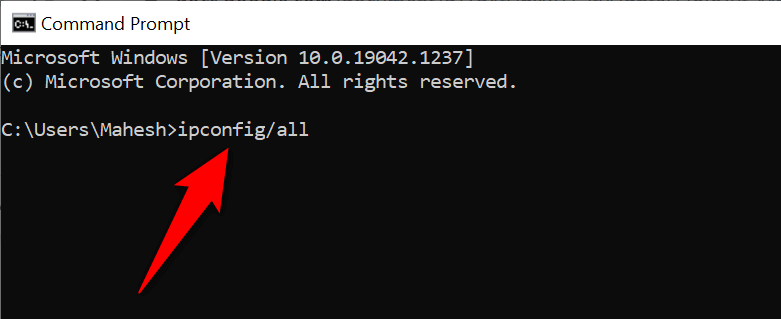
- Type the following command in the Command Prompt window and press Enter:
ipconfig /all
- Command Prompt will display various values on your screen. Find your network adapter here and look for the Physical Address field’s value. That’s your adapter’s unique MAC address. Make a note of this address.
Configure Your Router to Assign a Static IP to Your PC
You now need to access your router’s settings page. For most routers, you can do this by entering the 192.168.1.1 IP address in a web browser on your computer. If this doesn’t work for you, consult your router’s manual to find out how to access the settings page.
- Launch a web browser on your computer, type the following IP address, and press Enter.
192.168.1.1
- You’ll see your router’s login page. Enter your router’s username and password and continue. For most routers, you can use admin in both username and password fields.
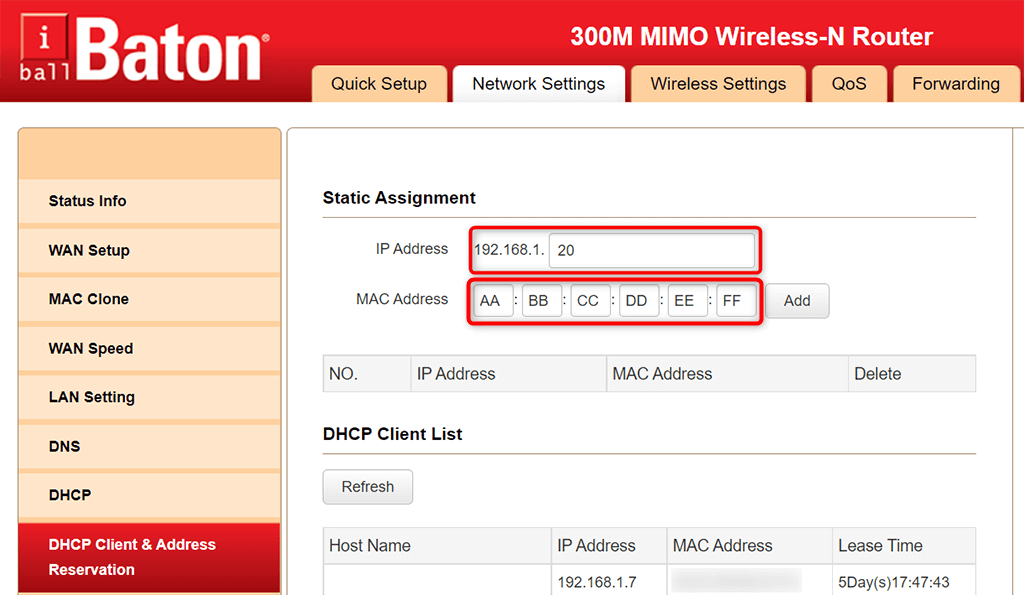
- Select Network Settings at the top of your router’s settings page.
- Choose DHCP Client & Address Reservation from the sidebar on the left.
- Enter the static IP address you’d like to assign to your PC in the IP Address field on the right.
- Type your network adapter’s unique MAC address in the MAC Address field. Then, select Add and then select OK at the bottom of the page.
- Restart your router.
When your Windows 11 or 10 PC connects to your router, your router will assign the specified IP address to your PC. This will happen each time you connect your PC to your router.
Assign a Static IP to Your Windows 10 PC
If you don’t wish to configure your router’s settings, the other way to assign a static IP address to your Windows 10 PC is by using the Windows Settings app. You can configure your IP settings in this app to ensure your PC always gets a unique static IP.
However, there’s a slight issue with this method. If your router has already assigned the IP address that you want for your PC to another device, you’ll experience issues connecting your PC to your router.
To get around this, try to use an IP address far beyond the general IP addresses that your router assigns. For example, if your router usually gives IP addresses up to, say, 192.168.1.10, then use 192.168.1.20 as the static IP for your PC.
To proceed with this method:
- Open the Settings app on your PC by pressing Windows + I keys at the same time.
- Select Network & Internet on the Settings window.
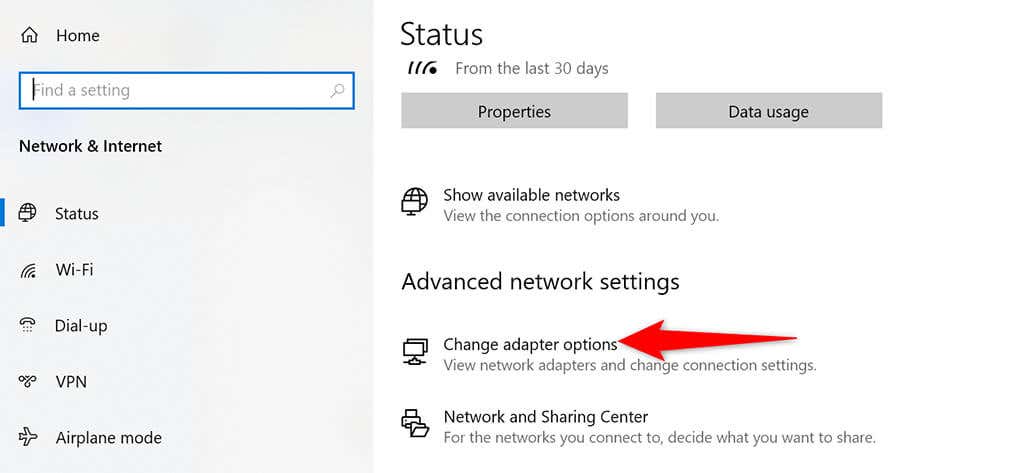
- Scroll down the Status page that opens and choose Change adapter options.
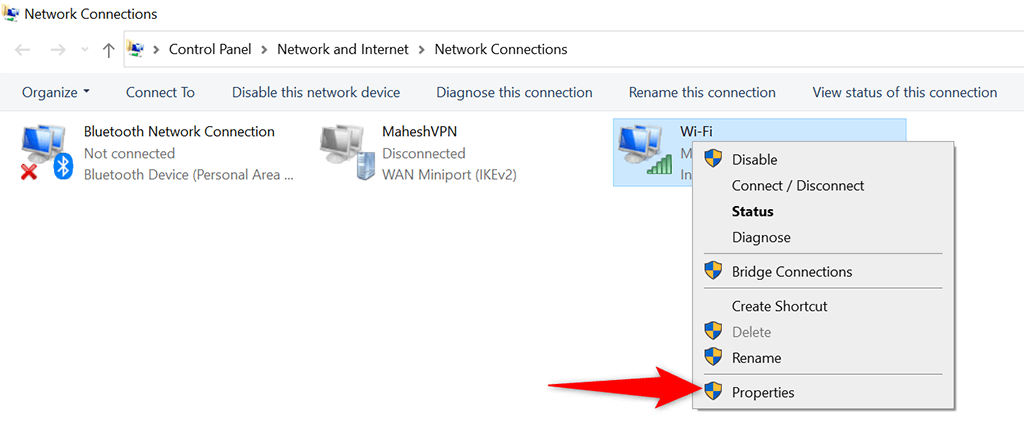
- You’ll see a list of your network adapters. Right-click the adapter that you use with your network and select Properties from the menu.
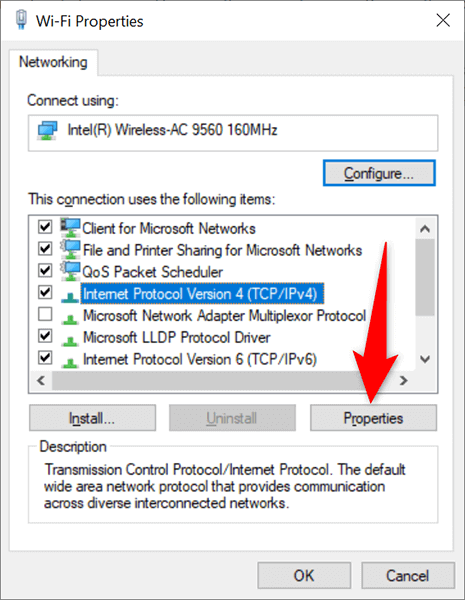
- Choose Internet Protocol Version 4 (TCP/IPv4) in the list and select Properties.
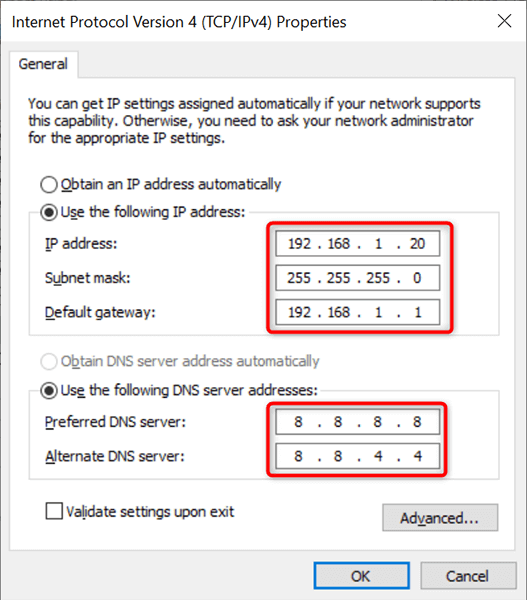
- Enable the Use the following IP address option on the following window.
- Select the IP address field and type the static IP address you’d like to assign to your PC.
- Fill in the Subnet mask field, which is usually 255.255.255.0. Type your router’s gateway, which is usually 192.168.1.1, in the Default gateway field.
- For DNS servers, you can use Google’s Public DNS. To use these, select the Preferred DNS server field and type 8.8.8.8. Select the Alternate DNS server field and type 8.8.4.4. Then, choose OK.
- Close the Properties window by selecting Close.
Your Windows 10 PC will disconnect from your router, and it will then automatically reconnect. After this reconnection, your PC should now have the specified static IP address allocated to it.
Assign a Static IP to Your Windows 11 PC
Like with Windows 10, you can use the Windows Settings app to assign a static IP address to your Windows 11 PC.
- Press Windows + I keys simultaneously to open the Settings app.
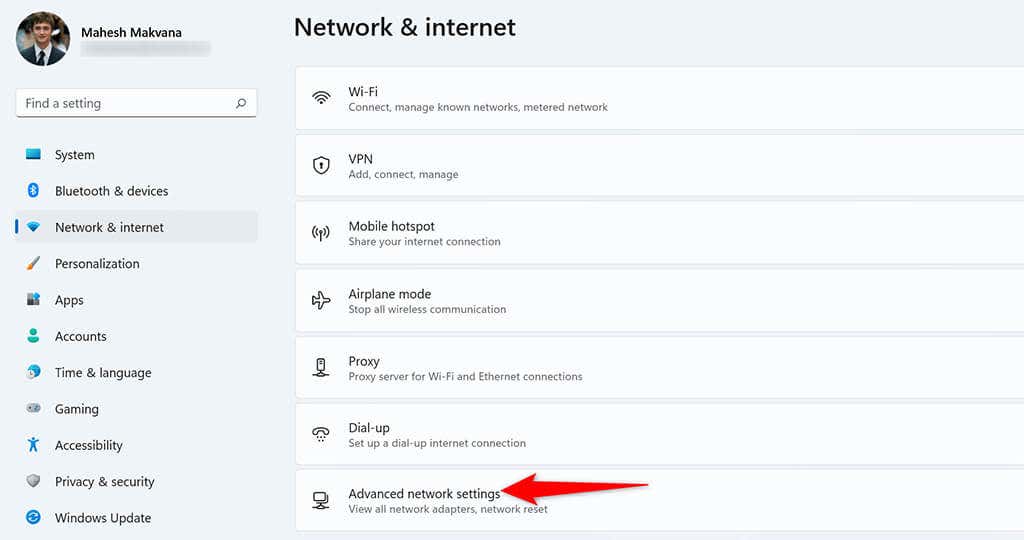
- Select Network & internet from the sidebar on the left in Settings.
- Select Advanced network settings at the bottom of the Network & internet page.
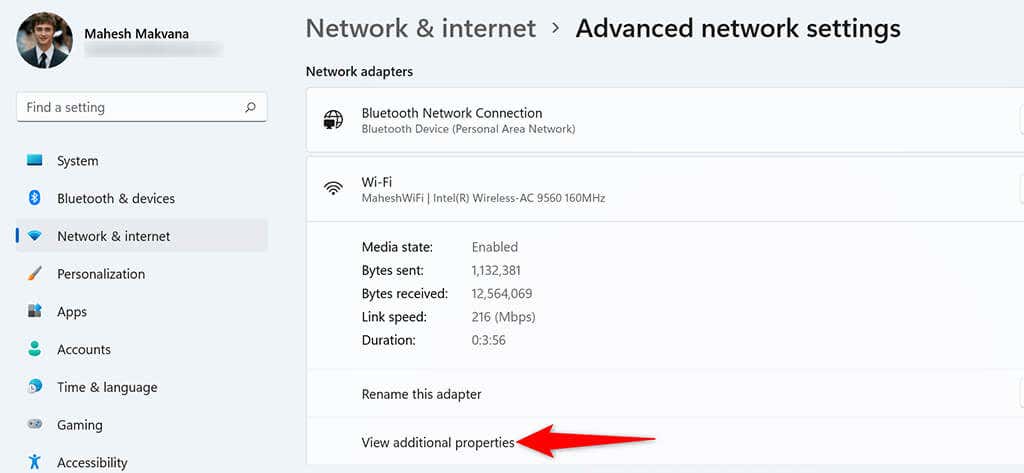
- Find your network adapter in the list and select the adapter. Then, select View additional properties.
- Select Edit next to IP assignment.
- Choose Manual from the Edit IP settings dropdown menu. Then, toggle on the IPv4 option.
- Select the IP address field and type the static IP address to assign to your PC.
- Select the Subnet mask field and enter 255.255.255.0. Enter your router’s IP address, which is usually 192.168.1.1, in the Default gateway field.
- Enter 8.8.8.8 in the Preferred DNS field. Enter 8.8.4.4 in the Alternate DNS field.
- Select Save at the bottom.
And your Windows 11 PC now has a static IP address assigned to it. In the future, your PC will continue to acquire this static IP address from your router, provided there are no IP conflict issues with your router.

