Share your best bits, get famous
Twitch is full of intense, fun, and hilarious moments that are incredibly share-worthy. That’s why you have Clips. Clips is a Twitch feature designed to help you deal with those very instances.
With Clips, Twitch lets you create short video snippets (or clips) of whatever it is that you’re watching. It even enables you to edit your takes, which means you can nail down the exact moments you want to capture.
Sharing obviously plays a major role in this feature. Besides letting you push your clips via social media or directly as Twich.tv links, Twitch will also publish them for everyone to see.
If you are yet to create your first Twitch clip, then this guide will walk you through how to clip on Twitch. The feature is baked into both the desktop and mobile versions of Twitch so you can start clipping on any device.
That said, you will come across channels that require you to be a subscriber or a follower before you can start creating clips. Some channels may even have the Clips feature disabled completely.
How to Clip On Twitch – Windows and Mac
You can capture, trim, and share clips in Twitch while streaming content on the PC and Mac via the Twitch desktop app or the browser-based web app.
1. Start playing a live stream or a previous broadcast in Twitch. If you use Twitch on your web browser, make sure you’re signed in to your Twitch account before proceeding.
2. Whenever you come across something that you want to clip, hover the cursor over the video. Then, select the Clip icon to the bottom-right of the pane.
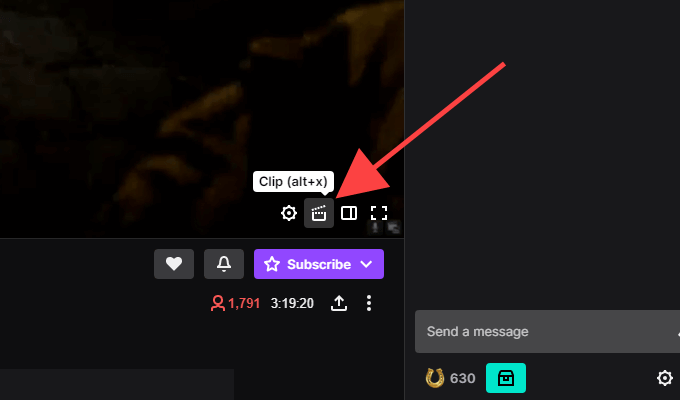
Tip: Use the Alt+X (Windows) or the Option+X (Mac) keyboard shortcut to start clipping faster.
3. A new Twitch pop-up window or browser tab should open and load the clip creation screen. Use the handles within the timeline to trim the video anywhere from 5 to 60 seconds—you have 90 seconds of footage to work with.
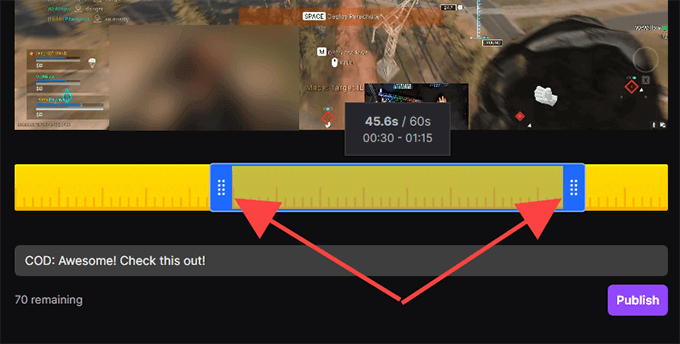
Note: If you exit the window or browser tab, Twitch will automatically publish the final 30 seconds of captured footage.
4. Insert a title. The clip will go public, so try to make it catchy. Then, select Publish.
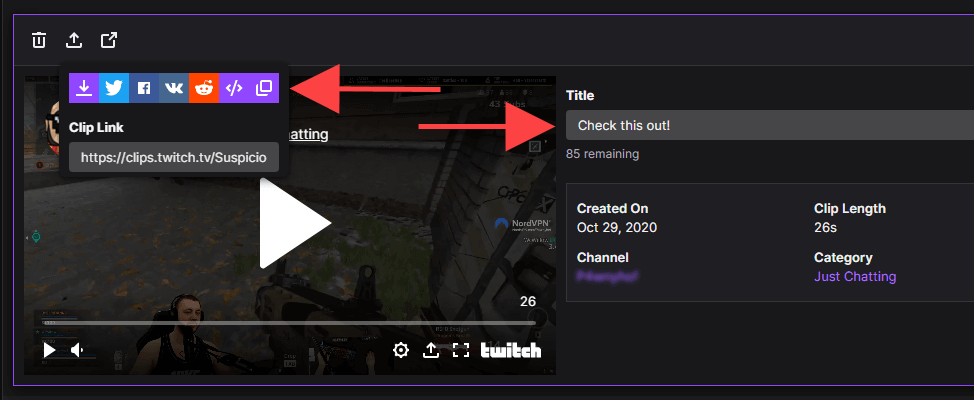
5. Select the Twitter, Facebook, or Reddit icons to share the clip on social media. If you want to grab a direct link to the clip, select the Copy to clipboard icon instead.
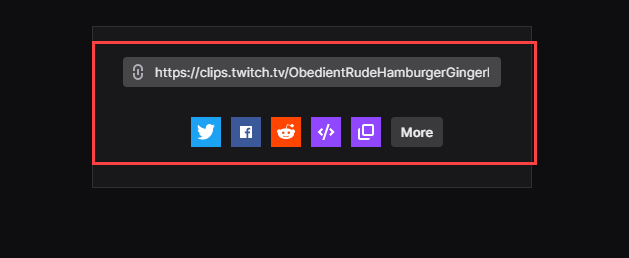
You can also use the Embed (</>) icon to insert the video into a website.
How to Clip On Twitch – Android and iOS
If you have the Twitch app installed on your iPhone or Android smartphone, you can clip, trim, and share videos just like on desktop. But, you can also share them before making any edits should you want.
1. Start playing a live stream or a previous broadcast.
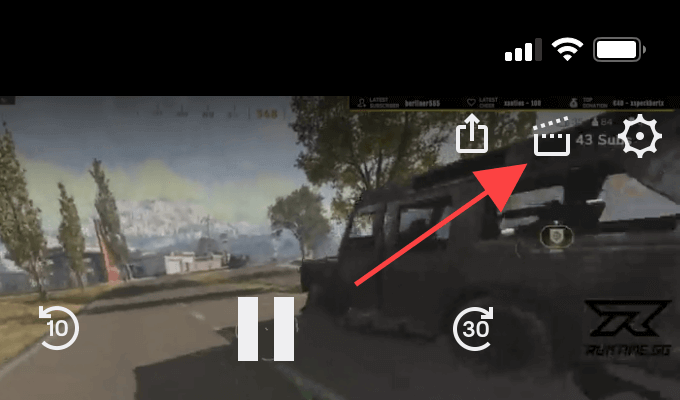
2. Whenever you want to clip something, briefly tap the video. Then, tap the Clip icon to the top-right of the pane.
3. You have two options. You can immediately share 30 seconds of footage using the share options at the bottom of the Create Clip screen. Or, you can tap Preview and Edit to trim the video clip. Let’s assume that you select the latter.
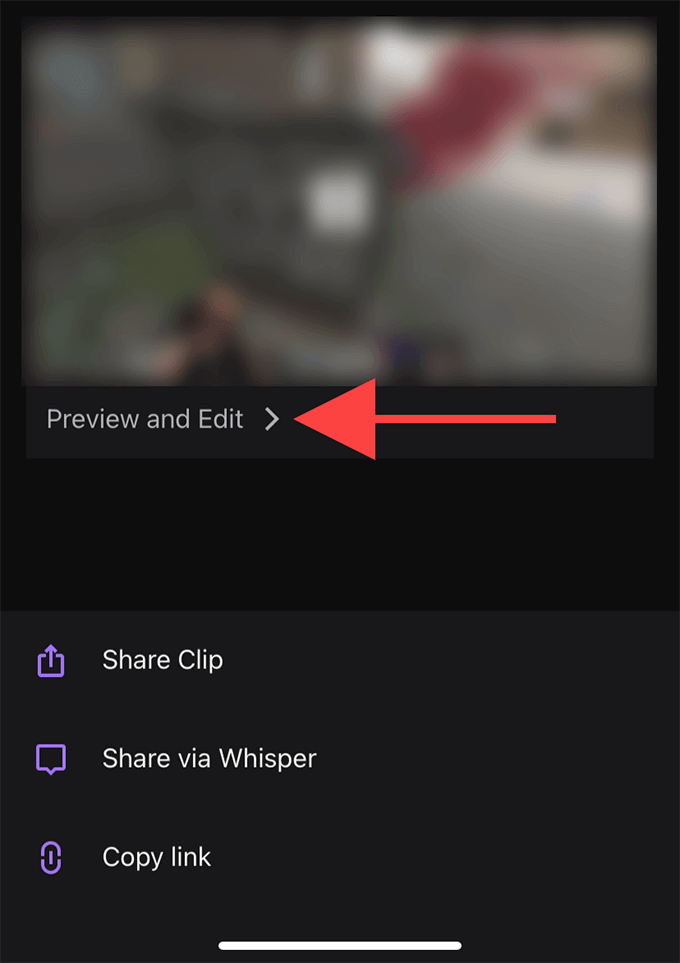
Note: If you share or exit the Create Clip screen, Twitch will automatically publish a 30-second clip.
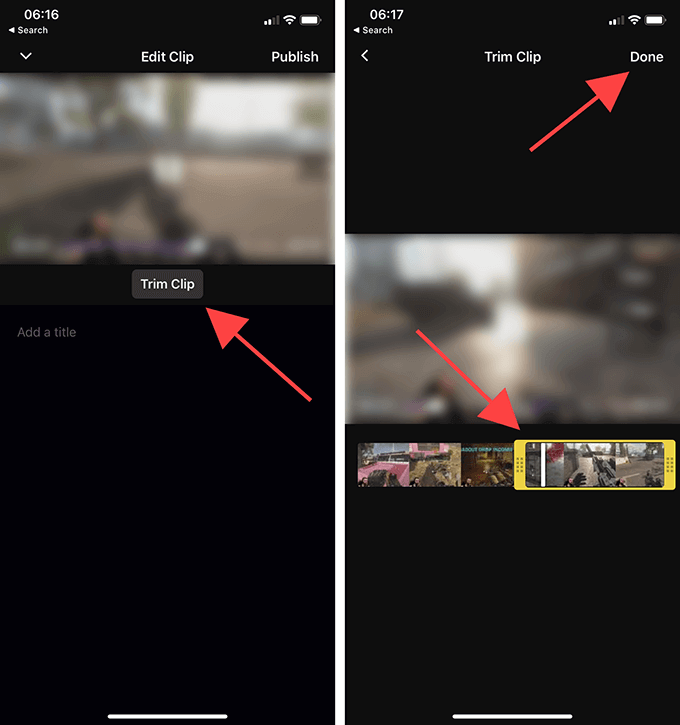
4. Tap Trim Clip. Follow this by using the handles within the timeline to trim the video. Tap Done to confirm your edits.
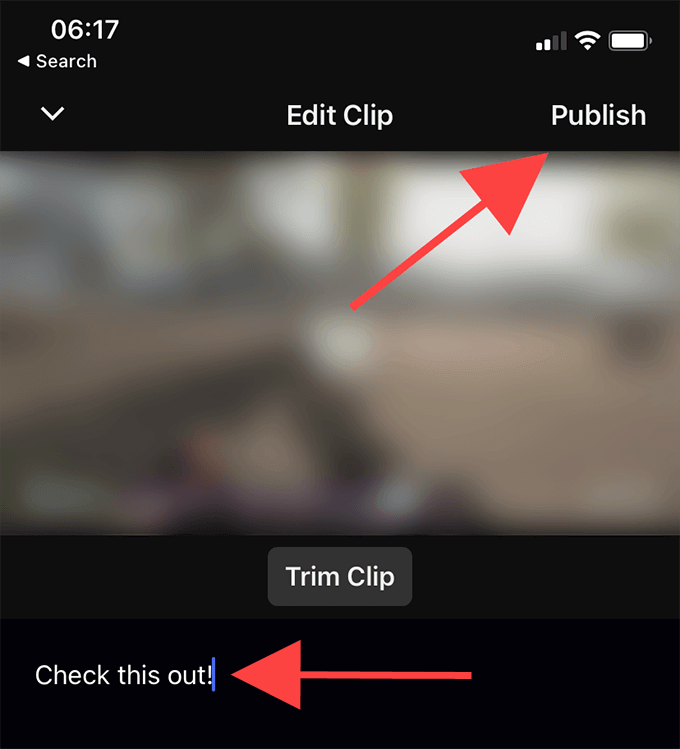
5. Name the clip, and then tap Publish.
6. You are now back within the Create Clip screen in step 3. Select Share Clip if you want to send out a link to the clip via any instant messaging app on your device.
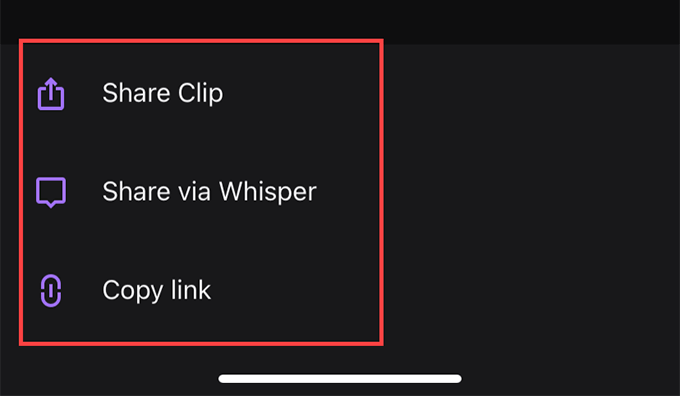
If you want to share the video via Twitch’s built-in chat service, select the Share via Whisper option. Or, tap Copy link to copy a link of the clip to the clipboard.
How to Manage Clips on Twitch
Twitch automatically publishes all clips that you create publicly. You can find them underneath the Clips section of the respective channels. However, it’s hard to spot them among clips from other Twitch users.
If you want to manage your clips, your best bet is to use the Clips Manager. Not only does it allow you to re-share or delete your clips, but you can also choose to download any clip locally.
However, you can only open the Clips Manager using a web browser.
1. Head over to Twitch’s Creator Dashboard (dashboard.twich.tv) and sign into your Twitch account.
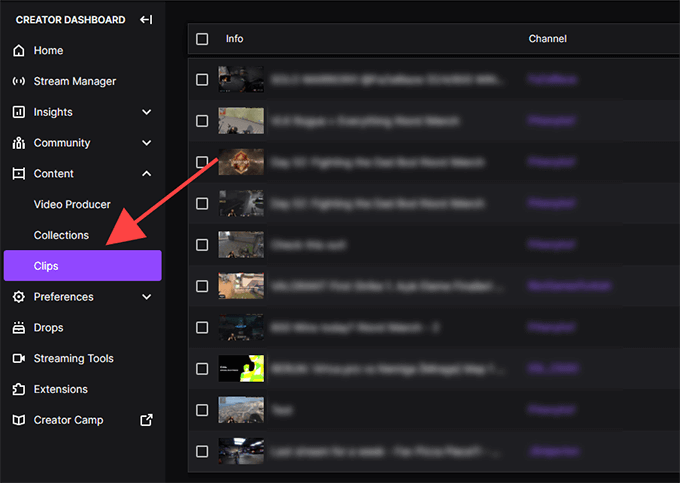
2. Expand Content within the left navigation pane of the Creator Dashboard and select Clips to access the Clips Manager. You should then see all clips that you’ve created to date.
3. Select a clip, and you can watch, delete, rename, or share it. You will also see a Download icon listed among the Share options. It allows you to grab a copy in the MP4 format. You can’t edit your clips, however.
You can filter clips by category or channel using the search bar to the right of Clips Manager. If you broadcast on Twitch, you can also view clips that others have created of your videos by selecting the radio button next to Clips of My Channel.
Start Clipping
With Twitch Clips, you don’t just capture and share stuff, but you also provide streamers with exposure to their content. Avoid spamming with the feature and use it wisely.


