But you'll still look silly to others
When you first get your hands on an Oculus (now Meta) Quest 2, you might be tempted to turn it on and dive into VR gaming – and there’s nothing wrong with that! If you take the time to enable a few specific settings, though, you’ll have a much better VR experience overall.
The Meta Quest 2 VR headset features multiple settings that can make it easier to use (and easier to get started gaming) for first-time users. Try these tips and tricks for new users and see whether you enjoy the headset more.
Enable Passthrough
Passthrough is a setting that lets you see through the external cameras of the headset. It paints the space around you in a sort of blurry black-and-white, but it’s significantly easier to find your controllers after putting on the headset. There are two main ways to accomplish this.
The first is to enable Passthrough Home, which does away with the default virtual environment and enables passthrough at all times except when you launch an app.
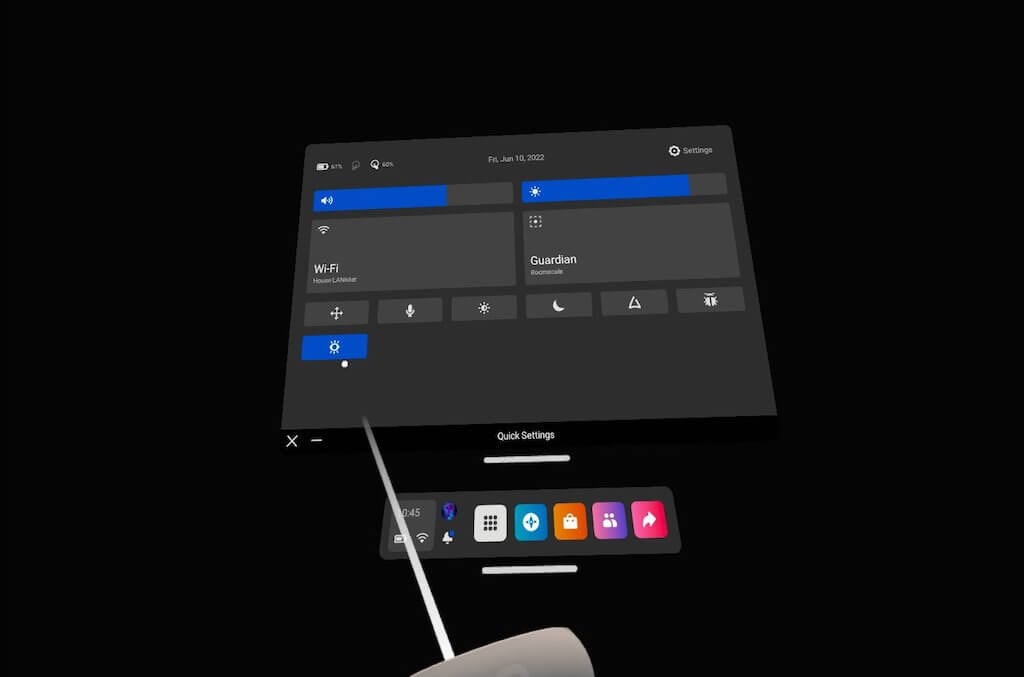
- Press the Oculus button on your right touch controller to bring up the quick menu, then select the Quick Settings icon in the lower-left corner.
- Once the Quick Settings menu appears, select the Eye icon.
- You’ll see the room around you rather than the virtual background.
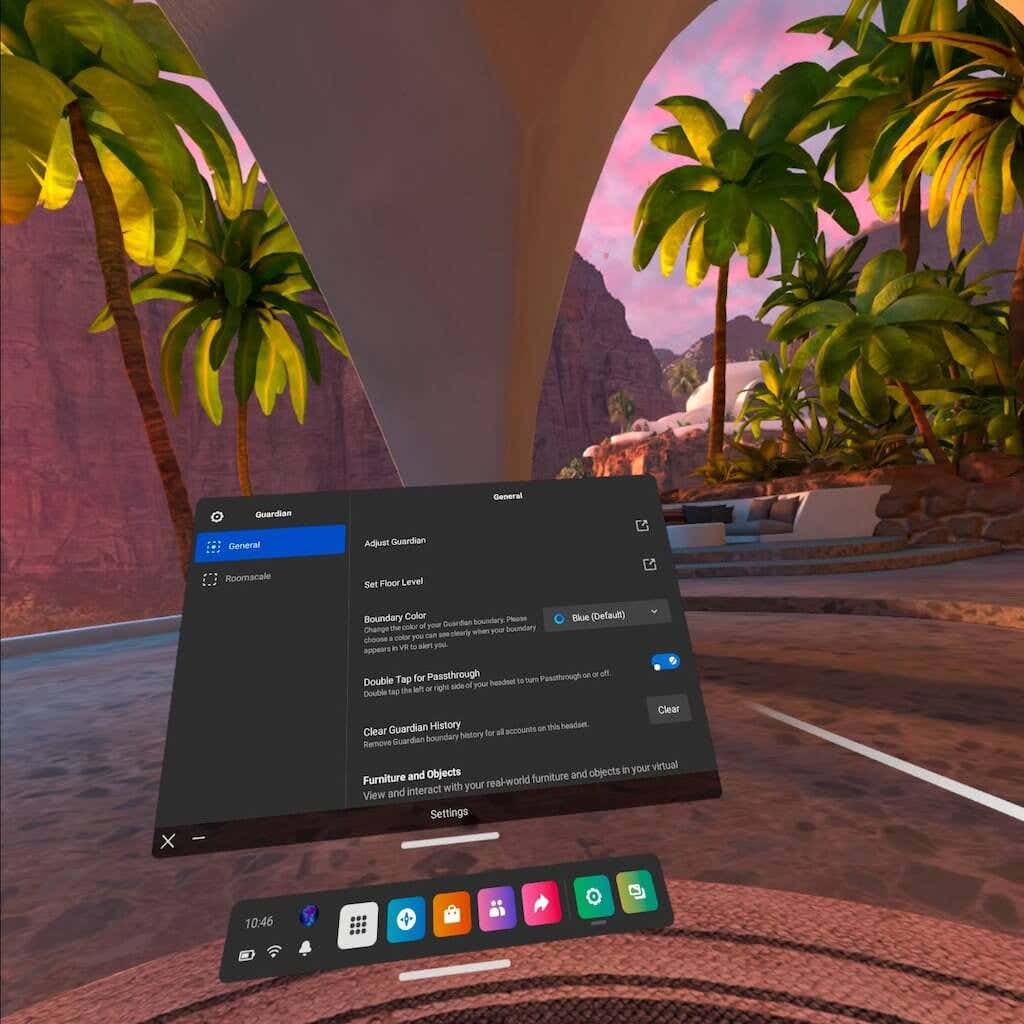
The second option is to turn on Passthrough Shortcut, which lets you activate Passthrough by double-tapping the right side of the headset.
- Open the Quest menu and select Settings in the top-right corner.
- Select Guardian.
- Select the toggle to activate Double Tap for Passthrough.
Once enabled, all you have to do is double-tap the side of the headset to see where you are in the real world. It’s perfect for centering yourself in the playspace if you get too close to the guardian barrier.
Invest in Alternate Lenses
If you wear glasses (as many of us do), then the Meta Quest 2 poses a bit of a problem. The headset is a tight fit and will often pull your glasses off when you remove the headset. There’s also the risk of scratching the internal Quest lenses (or your own glasses).
The Quest 2 internal lenses are fragile, and you must replace the entire lens if damaged. You should take extreme care to avoid harming them in any way. The included microfiber cloth is a great option for cleaning them. Just use gentle strokes and don’t press down against them.
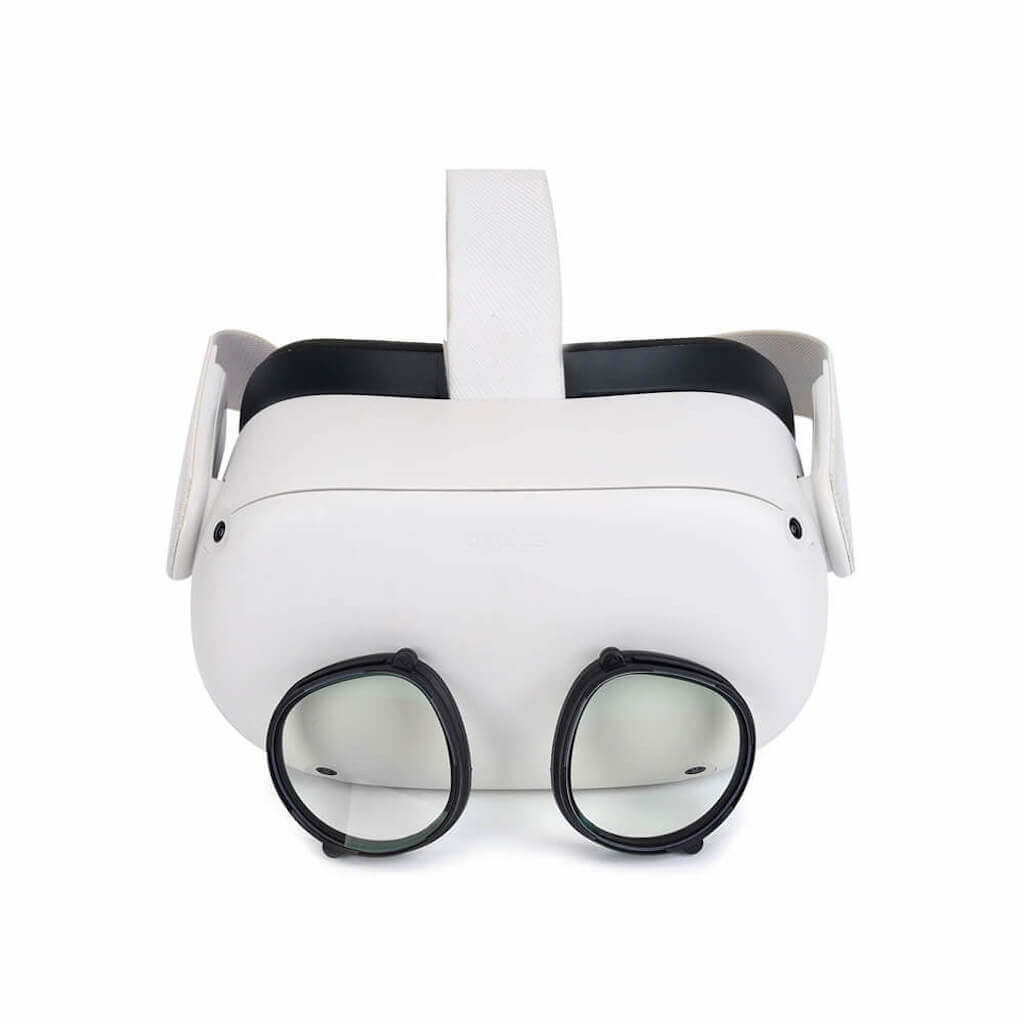
If you want to mitigate this risk, you can purchase snap-in prescription lenses from companies like HonsVR, VR Lens Lab, and WIDMOvr. The process is simple: Just enter your prescription on the site and they’ll show up to your doorstep within a few weeks. The lenses fit magnetically onto your VR headset.
You’ll be able to play in VR without the need to wear glasses. Best of all, it adds another layer of protection on the internal lenses of the Quest, and you can even opt for features like blue light filtering and anti-glare.
Another benefit: These typically include a padded VR cover that protects your lenses from sunlight exposure when not in use.
Try Unreleased and Experimental Games Through App Lab
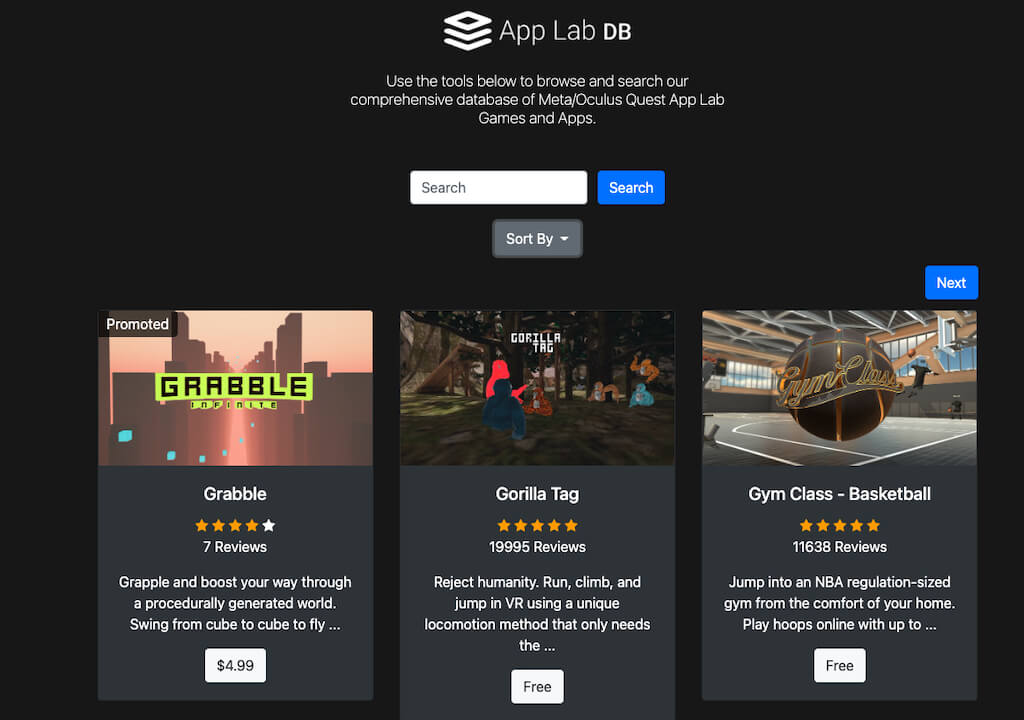
App Lab is a platform where designers can add in unfinished and experimental VR games. These games often leave the App Lab once they’ve been thoroughly tested, but it’s a great way to find inexpensive, wildly innovative VR experiences.
App Lab DB is a working database of all known App Lab games. It allows you to sort by popularity, age, rating, and even price. You can also search for specific titles. Some of the most well-known Quest 2 games today (like Gorilla Tag) got their start on App Lab.
Once you find a game, App Lab will take you to the download page within the Quest 2 store. Just choose to download the game and it will appear in your Quest 2 headset, assuming you’ve linked your Facebook account to the Quest store already.
Check a Game’s Comfort Level Before You Play
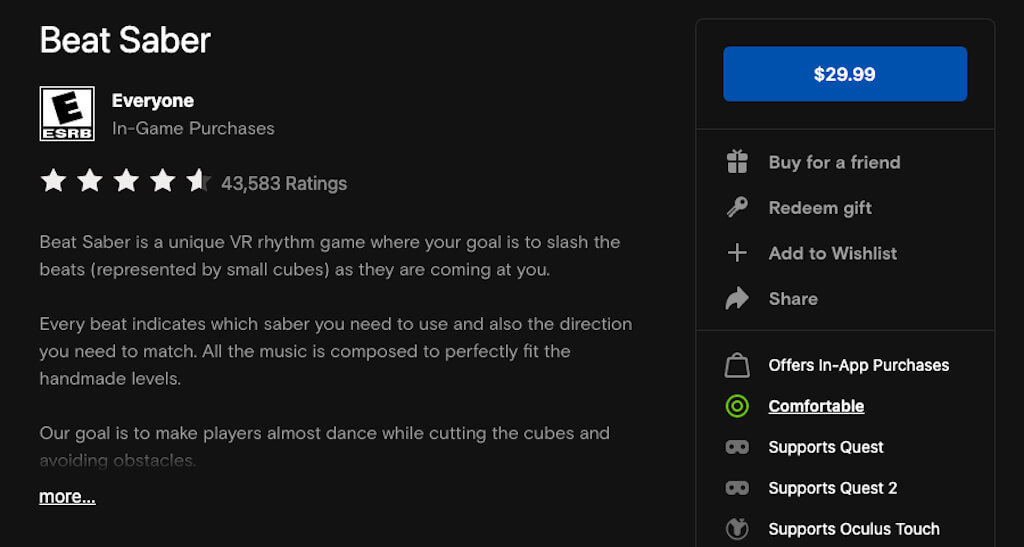
Every game in the Oculus store is given one of three comfort ratings: Comfortable, Moderate, or Intense.
Since virtual reality gameplay can often cause motion sickness, these ratings are important to help you discover whether a game is the right fit for you. Comfortable Games are okay for almost anyone to play, while Moderate games are okay for most players – but not all. Intense games should be avoided by those new to VR until they get the hang of it.
An example of a Comfortable game is Beat Saber, where you stand in one place and only swing your arms. An Intense game would be Gorilla Tag, where you swing your arms and propel yourself across the arena with a lot of quick movement.
You can find the Comfort Level of a game by selecting More Info in the app page of the Oculus Store.
Connect to Your PC Through Air Link or Link Cable
If you find yourself a bit limited by the library on the Oculus Store, don’t worry. You can play some of your favorite PC games thanks to the Oculus Link feature. This lets you play PC VR and SteamVR games on your Quest 2 headset. It’s an experimental feature, but it works well – especially if you have a long USB-C cable to give you more mobility.
You can also use this feature to enable mods for your favorite VR games, like Beat Saber. Don’t overlook this setting – it gives access to some of the best VR experiences out there. We have a full guide on how to do this.
Stream Your Gameplay
Want to convince someone else to join in on the fun? You can stream your gameplay and let others see exactly what it’s like inside VR. One of the easiest ways is to cast your gameplay to Chromecast or something similar. You can also cast gameplay to an Apple or Android phone.
Another option is to just take screenshots of the craziest events you see while in VR. These can be shared over Facebook with your friends. Who knows – you might have that multiplayer team you’ve been wishing for.
If you have a new Meta Quest 2 headset, do a little research before you dive in. There are a lot of helpful features and settings that aren’t immediately obvious but will yield massive gameplay benefits.

