Get connected again in no time flat
Most of us are connected to the internet at all times and losing that connection can be frustrating, especially if you need it for work. If your internet connection fails and you don’t have access to Wi-Fi, utilizing someone else’s hotspot is usually the go-to solution.
But what happens when your hotspot is not working? In this article, we’ll cover 10 of the best solutions to get your hotspot up and running again.
1. Check Your Internet Connection
The first thing to check is that the internet connection is working on the device that’s sharing the hotspot.
The quickest way to check your connection is by loading a webpage on your browser. If it doesn’t work, you need to troubleshoot your internet connection. For example, you may have reached your limit (depending on your phone plan), or there could be an outage in your area.
2. Restart the Wi-Fi Connection
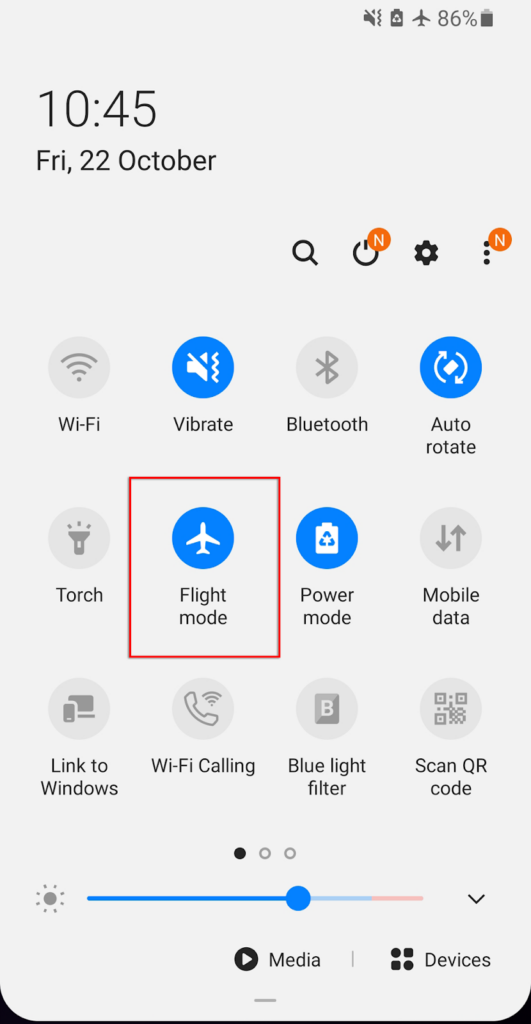
The simplest way to restart your phone’s wireless connectivity functions is by enabling airplane mode briefly. This can often solve bugs that arise with your hotspot functionality.
To enable airplane mode, drag down from the top of your screen to open the notification bar. Select the Airplane mode icon (the little plane). Disable airplane mode after 30 seconds and check if your hotspot is now working.
You should do this on both the receiving and sending devices as the problem may arise on either.
3. Restart Your Phone
Many of us use our phones for days or weeks at a time, accumulating several running programs in the background, which hampers your phone’s processing speed. Sometimes this can cause bugs or errors. Often, restarting your phone is enough to reset these bugs and refresh your phone.
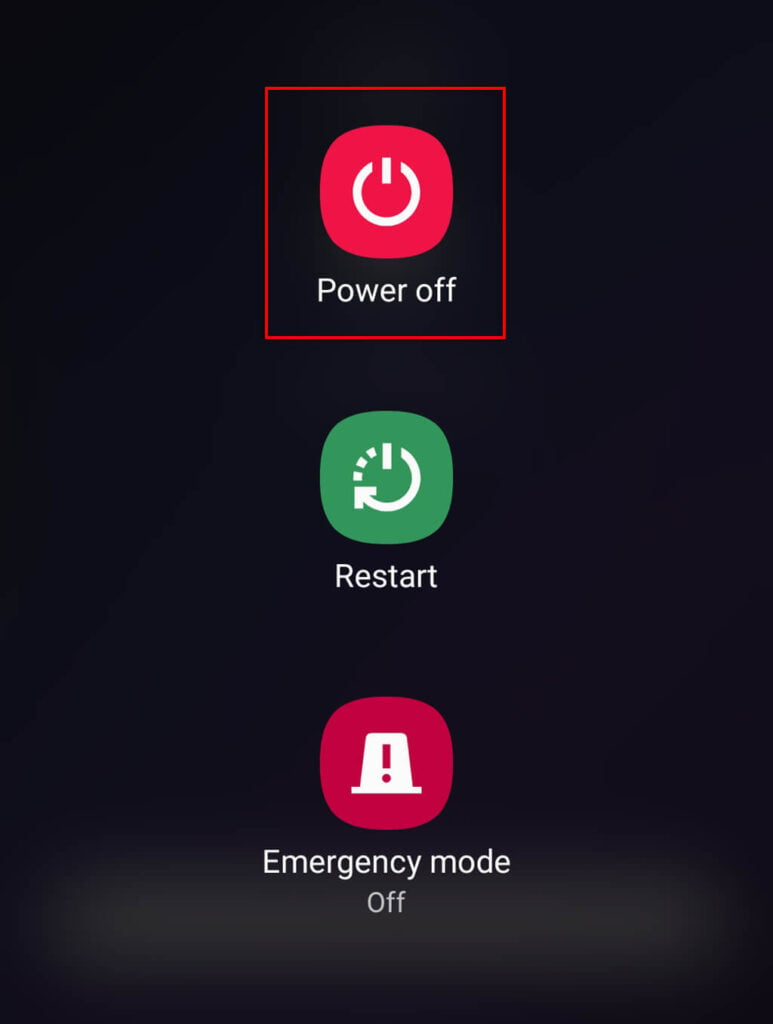
To restart your phone, hold the power button for a few seconds. When the pop-up appears, select Power off. Wait up to 30 seconds, then restart your phone and check if the hotspot is now working.
4. Turn Off Battery Saver
Several Android users have noted that battery saver mode can affect your hotspot connectivity. Though this shouldn’t occur, it’s worth trying as it may be a quick solution for your hotspot troubles.
To disable battery saver mode:
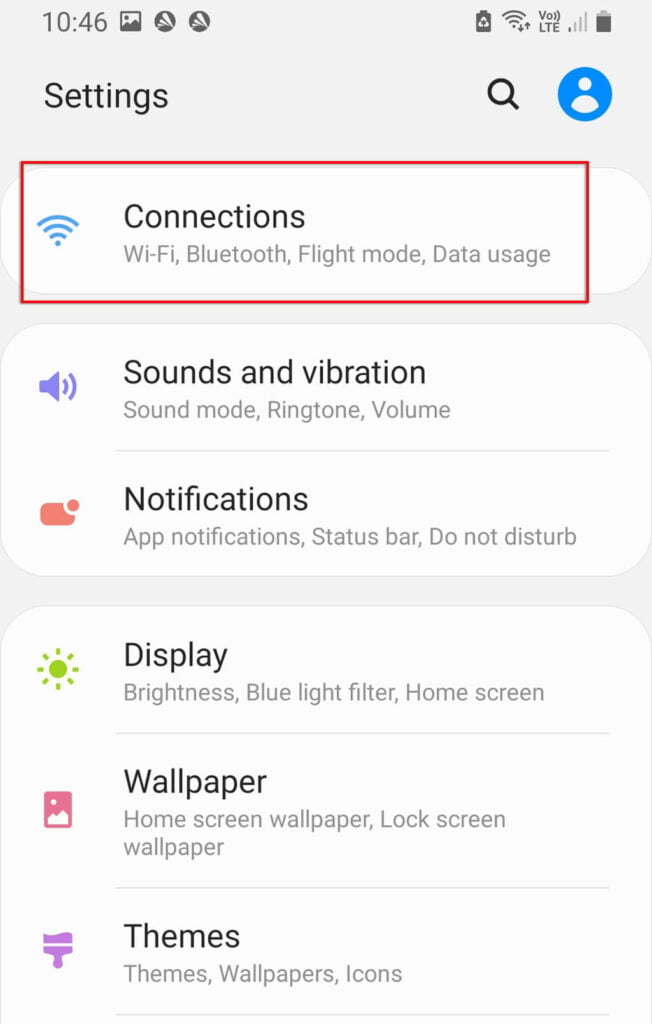
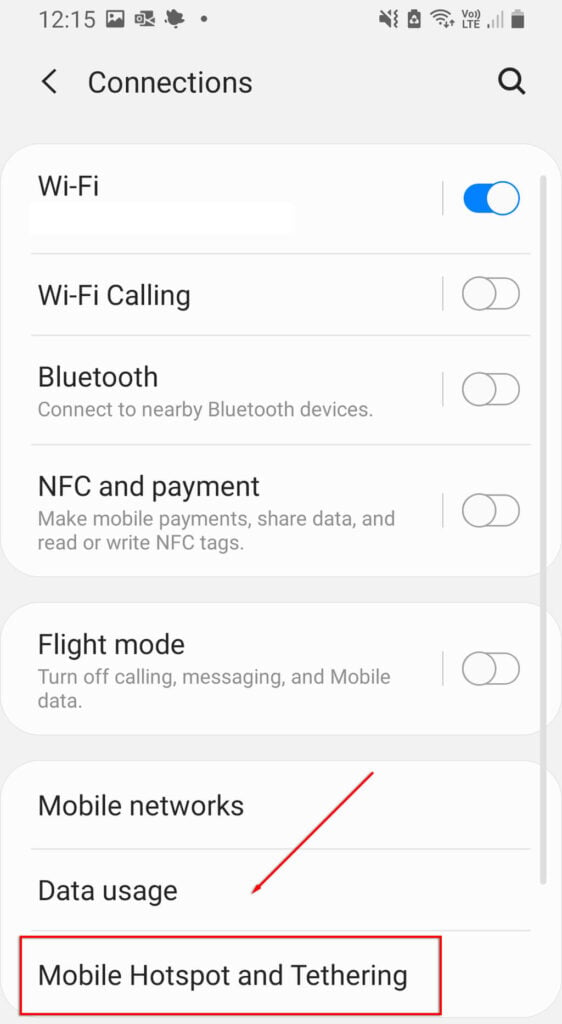
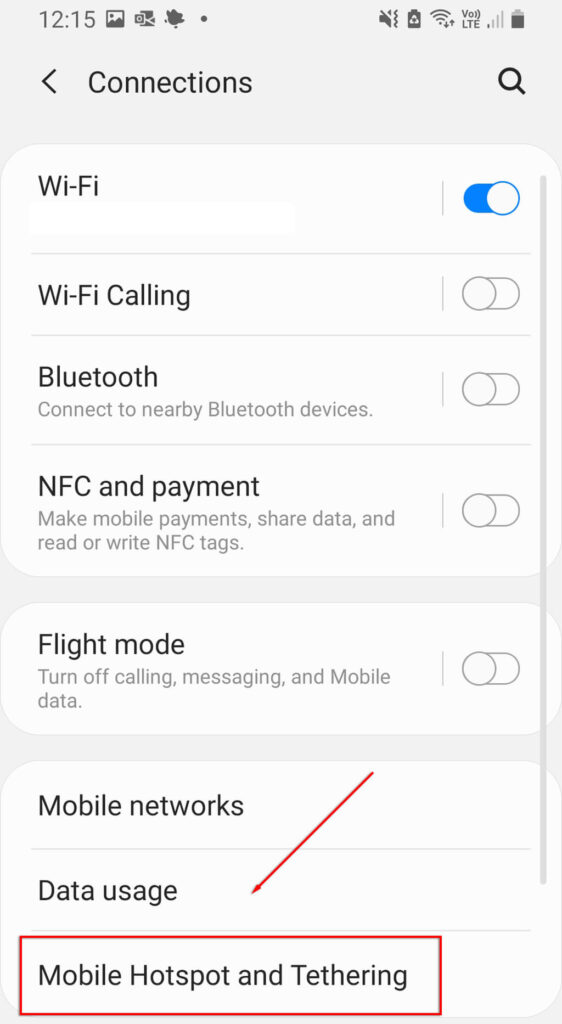
- Open Settings and tap Connections.
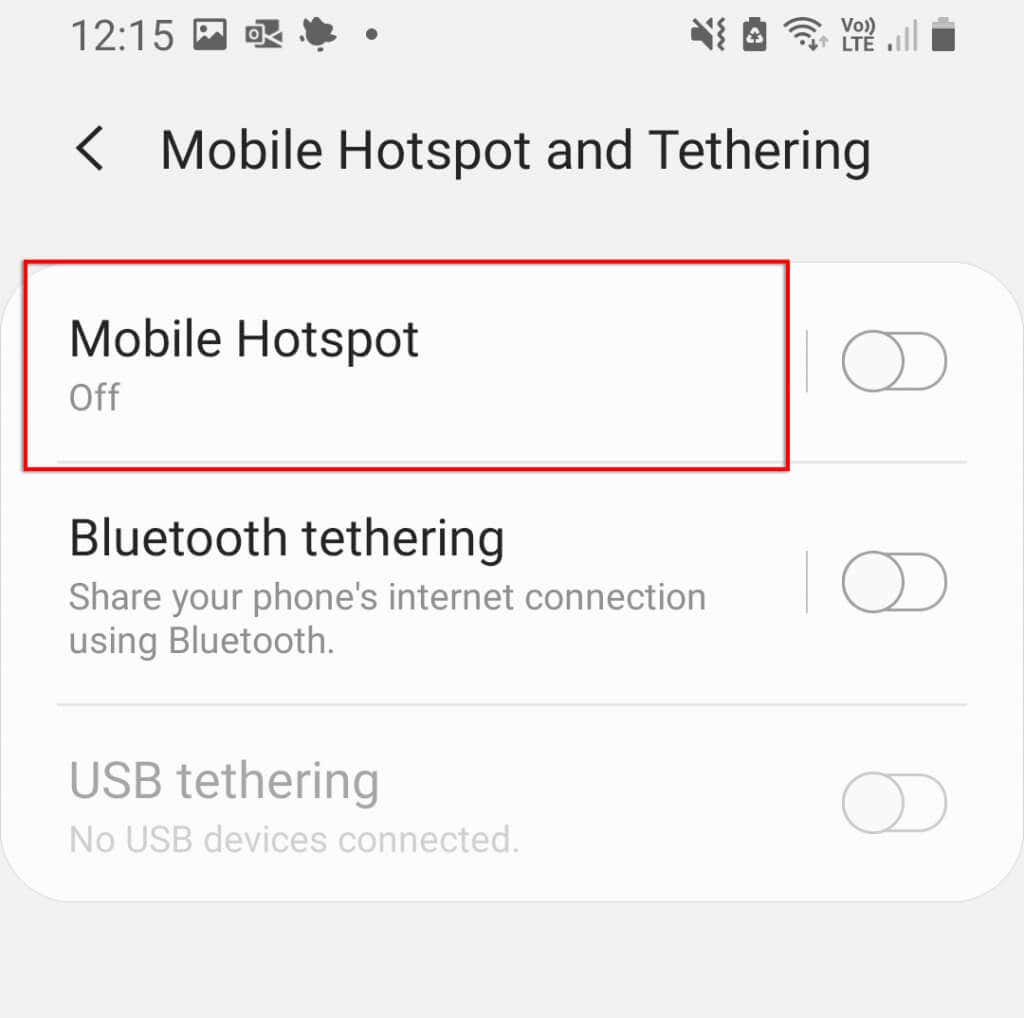
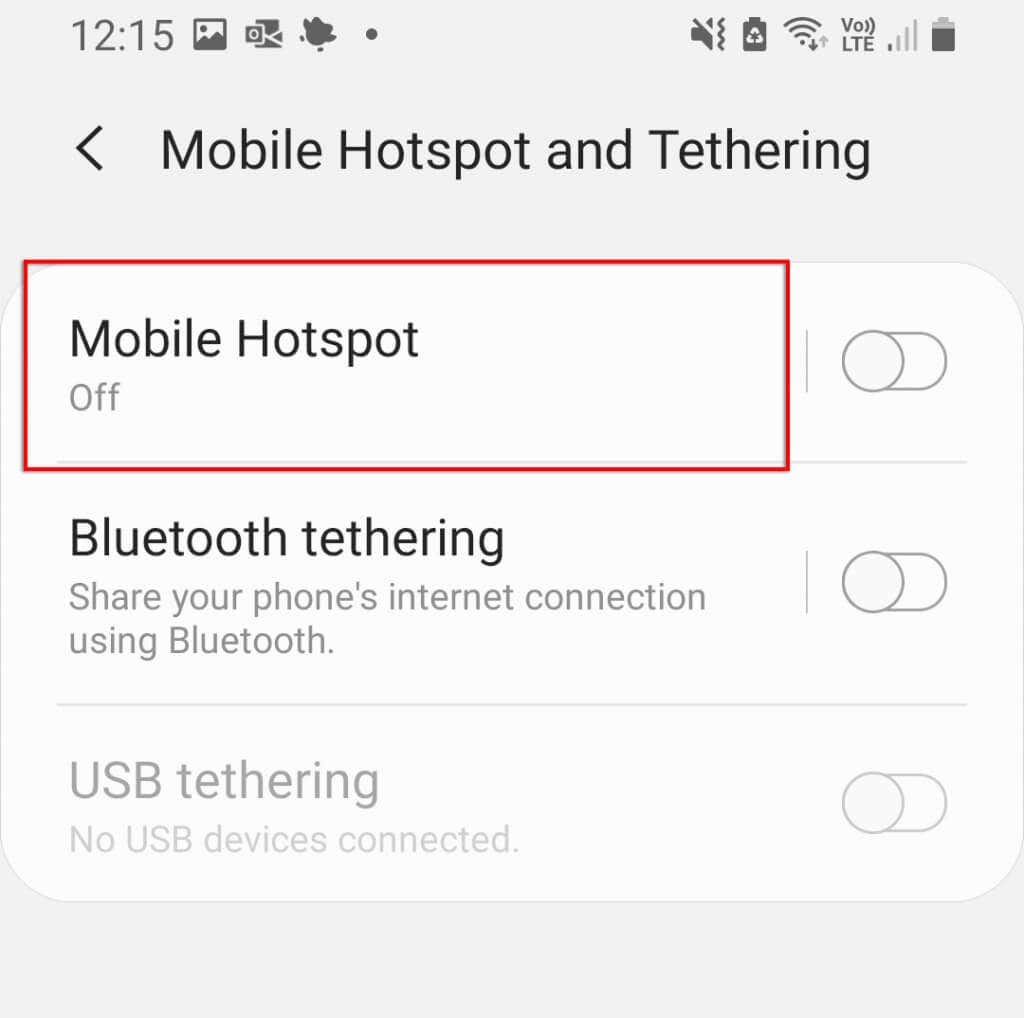
- Select Mobile Hotspot and Tethering.
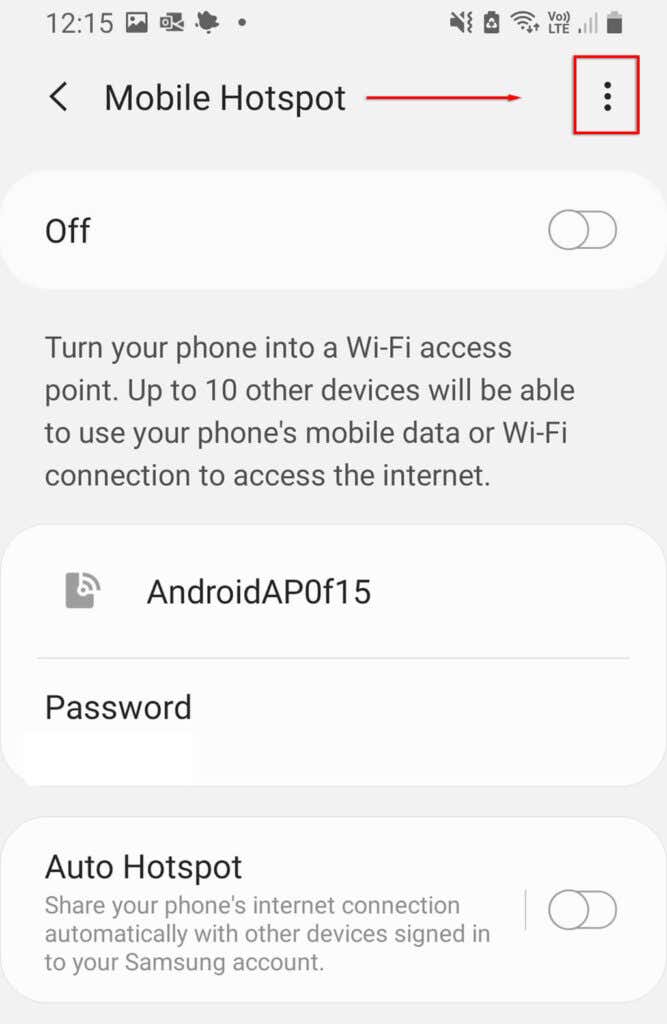
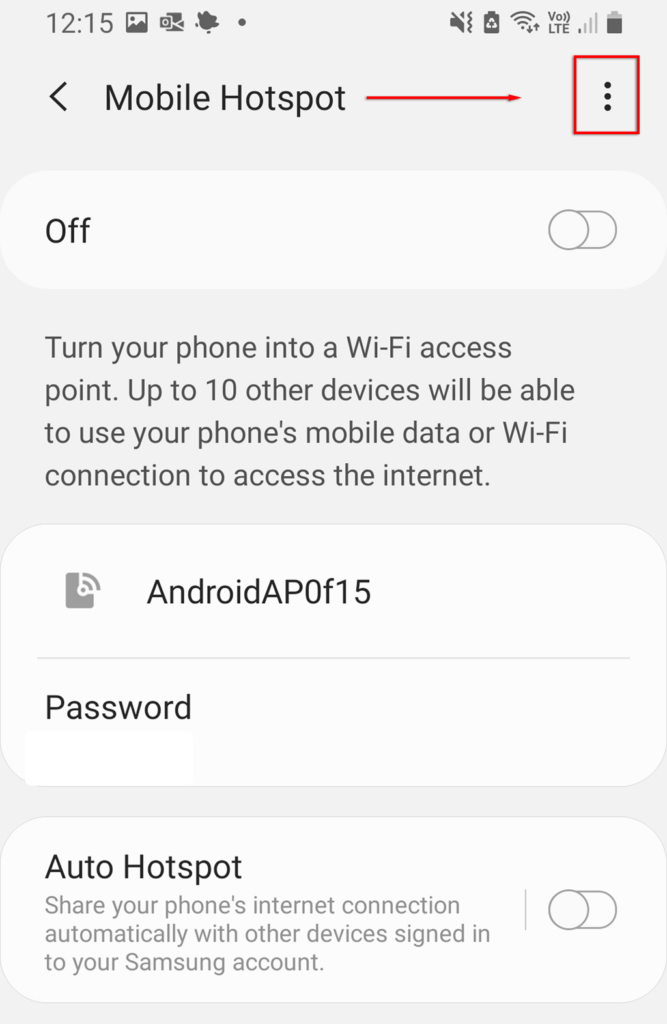
- Tap Mobile Hotspot.
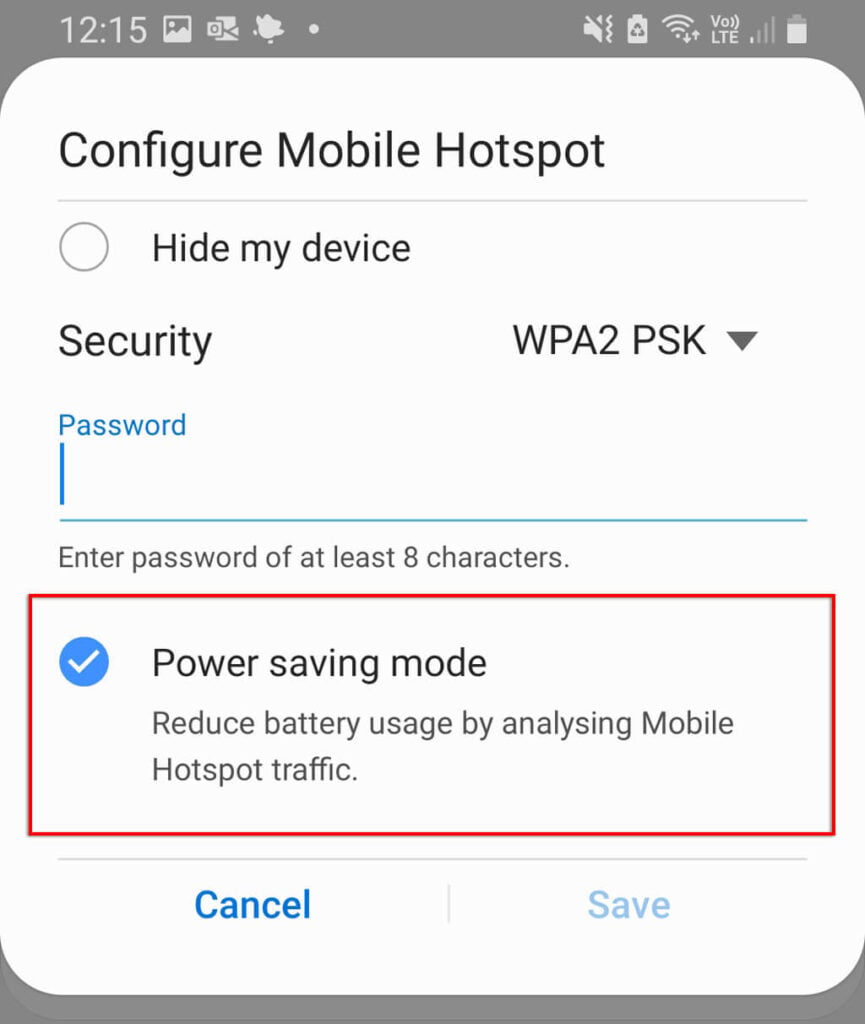
- Tap the three dots at the top-right of the menu and select Configure Mobile Hotspot.
- Turn off Power Saving Mode.
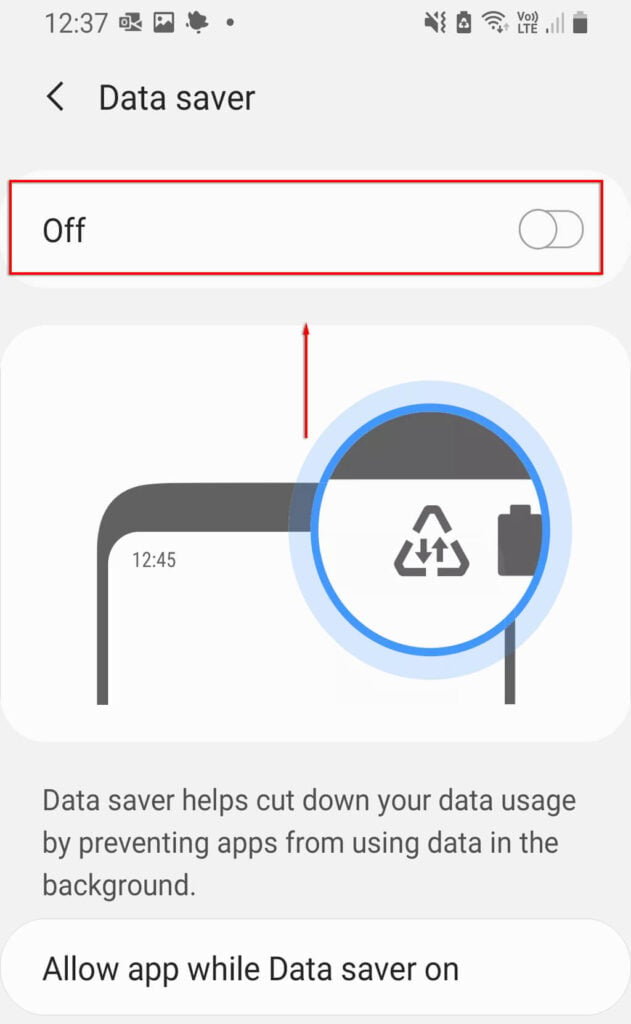
Data saver mode has also been reported to sometimes affect hotspot functionality. To disable this:
- Open Settings.
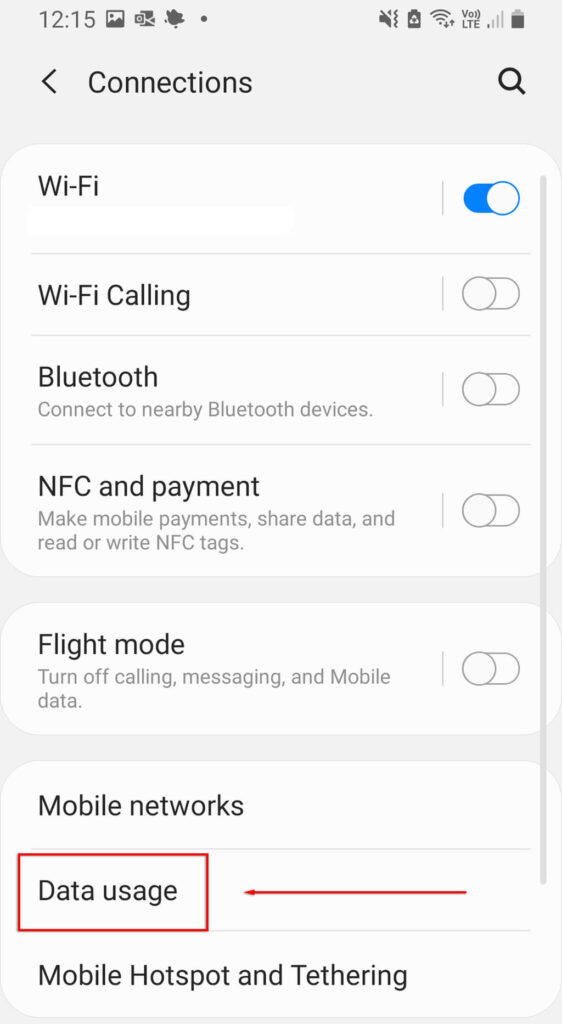
- Select Connections.
- Select Data Usage.
- Disable Use Data Saver.
5. Turn Off Your VPN
Virtual Private Networks (VPNs) can affect your internet speed and cause connection problems over an Android hotspot. While they’re excellent for protecting your online privacy, you may wish to try disabling them when you need to use the hotspot and re-enabling them afterward.
To turn off your VPN, you can open up the VPN app directly and disable it. Otherwise, follow these steps:
- Open Settings.
- Select Connections.
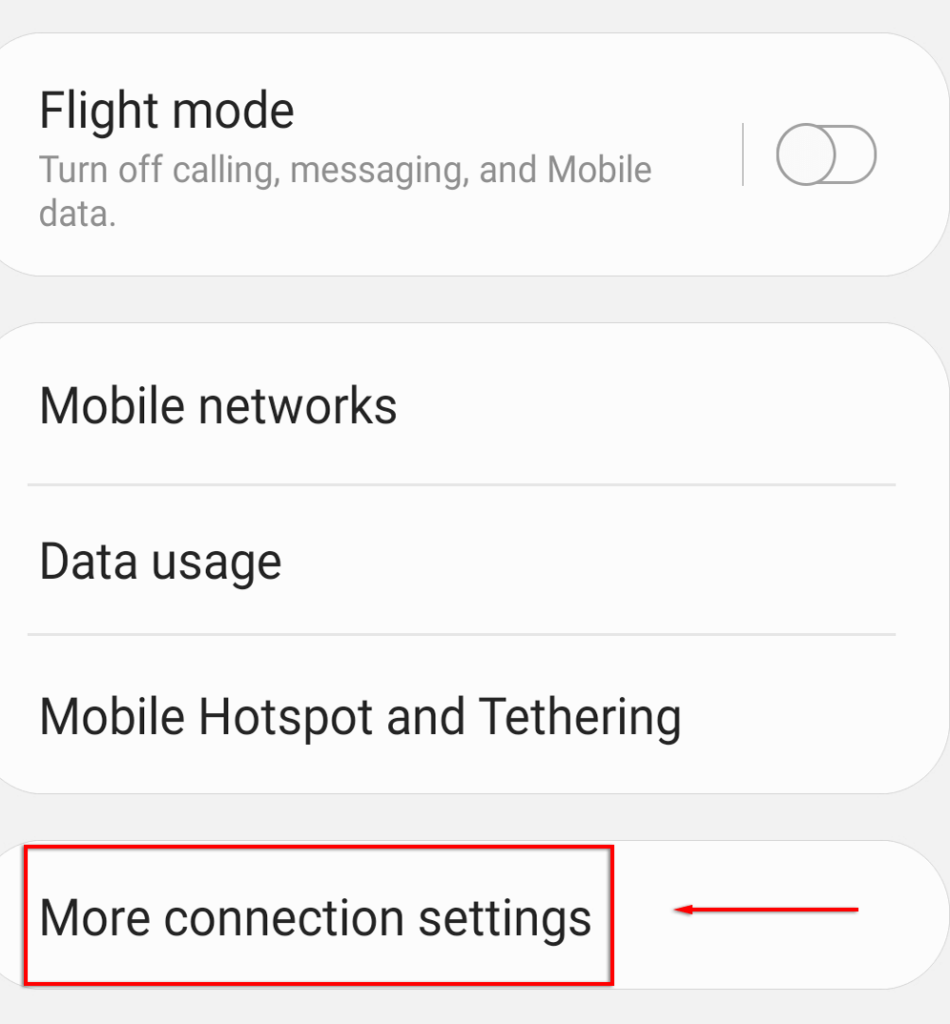
- Select More connection settings.
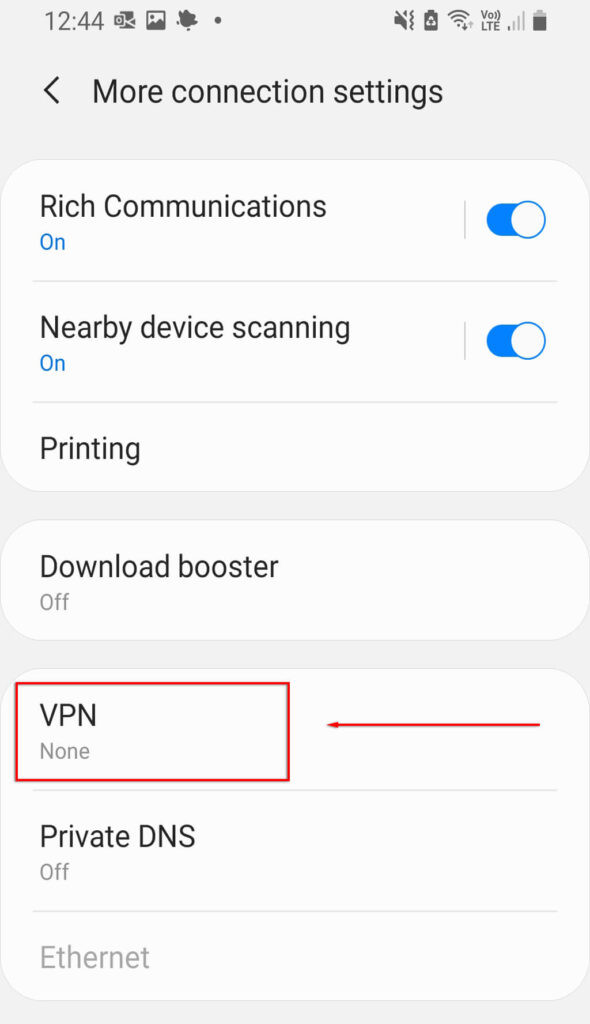
- Select VPN, then disable any VPNs that are active.
6. Turn Off Automatic Hotspot Switching
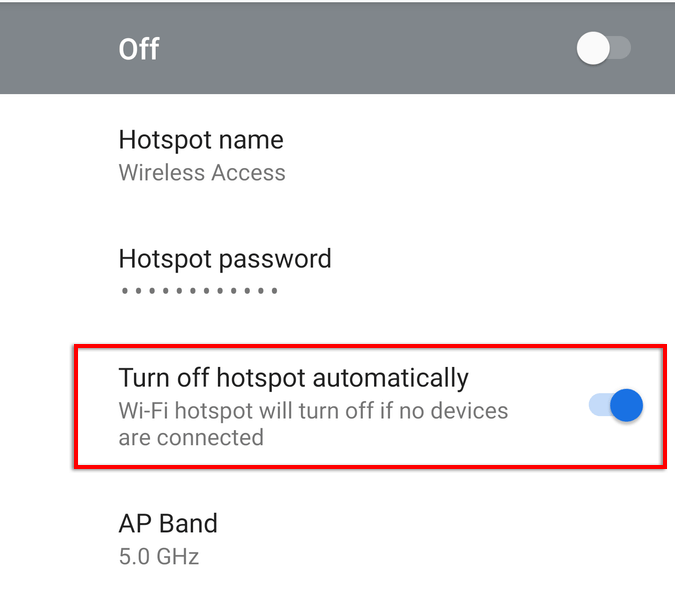
Automatic hotspot switching is a feature included in recent versions of Android. When enabled, if no device is connected to the hotspot for a few minutes, it will deactivate the hotspot. This may switch your hotspot off intermittently as your phone idles for too long. To disable it:
- Open Settings.
- Select Connections > Mobile Hotspot & Tethering.
- Select Mobile Hotspot.
- Select Turn off hotspot automatically.
Note: Some models don’t display this option.
7. Check Your Wi-Fi Band
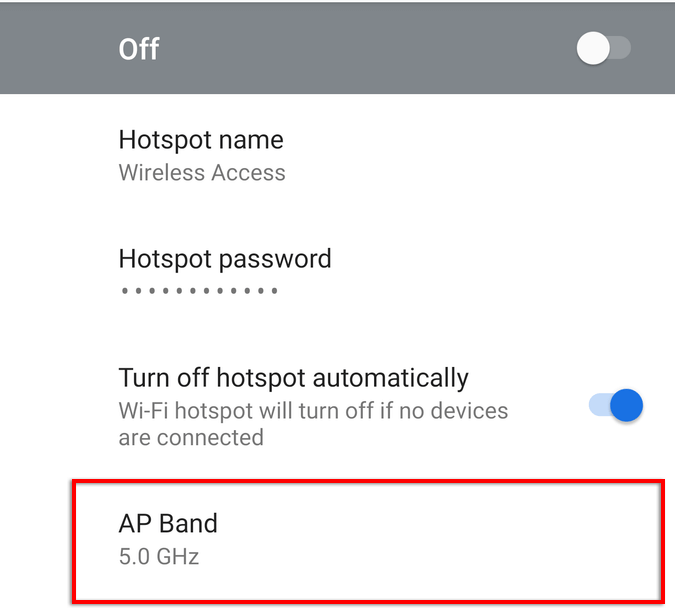
Some of the latest Android phones support both the 2.4 GHz and 5 GHz Wi-Fi bands. However, older phones cannot access the 5 GHz frequency. If your phone can only receive the 2.4 GHz frequency, you should ensure that your hotspot is set to the standard 2.4 GHz band.
To do this:
- Open Settings and tap Connections.
- Select Mobile Hotspot and Tethering.
- Tap Mobile Hotspot.
- Tap the three dots at the top-right of the menu and select Configure Mobile Hotspot.
- Select Use 5 GHz band when available or 5 GHz Preferred.
Note: Not all Android phones feature this functionality.
8. Create a New Hotspot Without a Password
One final thing to try is to create a new hotspot without password protection. Although password protection is generally recommended, it may cause issues and prevent you from connecting. To see if this is the case:
- Head to Settings > Connections.
- Select Mobile Hotspot & Tethering.
- Select Mobile Hotspot.
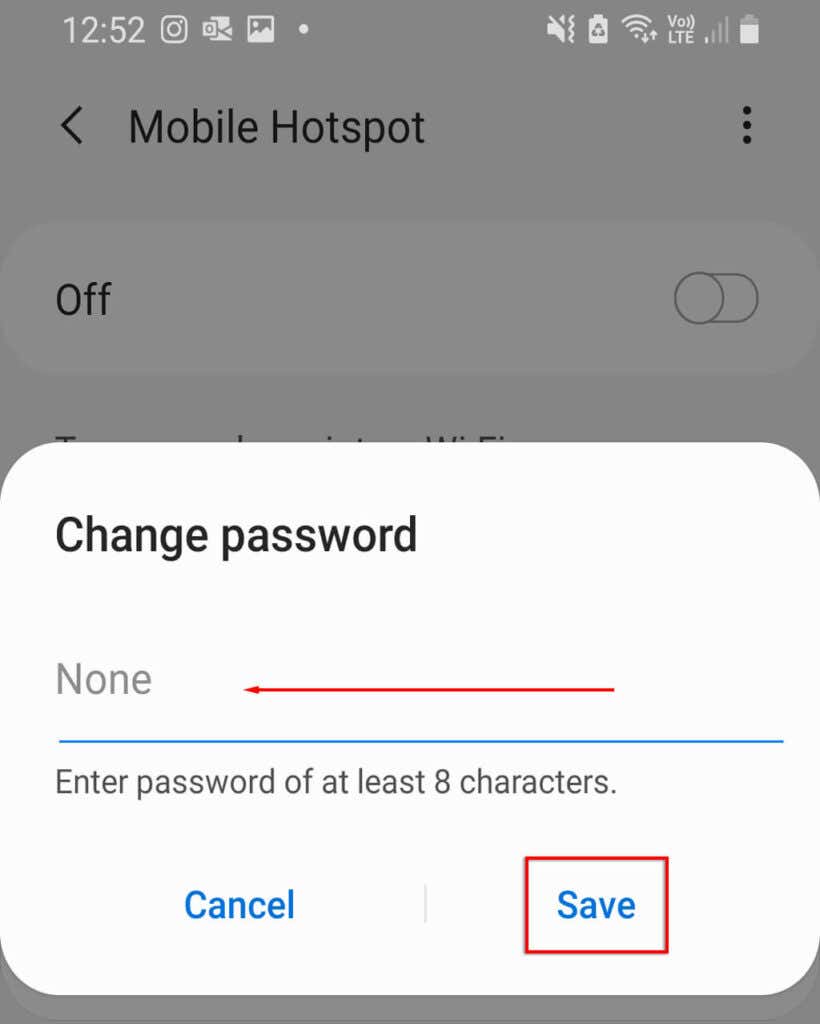
- Select Password.
- Delete any password and select Save.
We recommend changing the hotspot name to avoid problems with your device’s memory of that network. If your Android can now connect to the hotspot, you should now add password protection to prevent security threats to your device.
9. Try Bluetooth Tethering
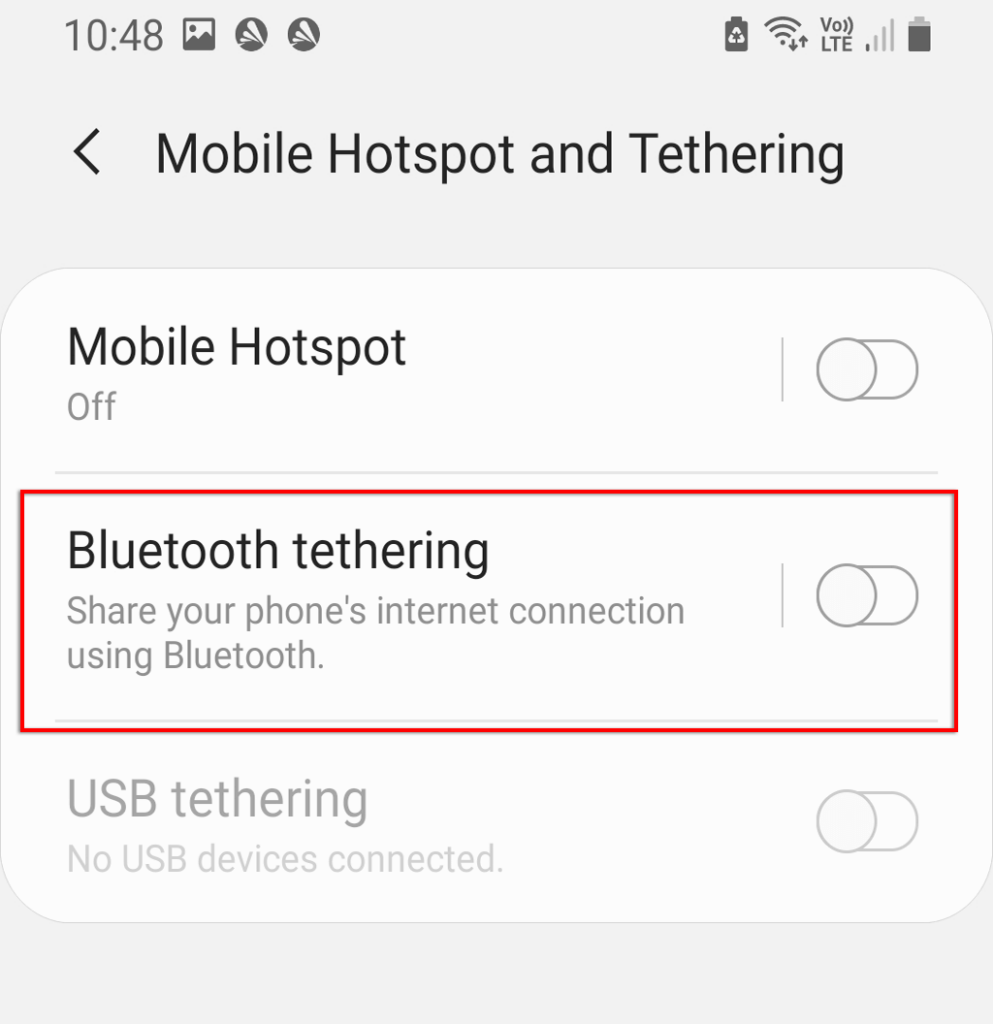
You may wish to try Bluetooth tethering instead of the Wi-Fi hotspot as a last resort. This is another way to share your internet with others, and the only disadvantage is that it’s slower. If you need the internet, it’s worth giving it a go.
- Open Settings.
- Select Network & Internet > Mobile Hotspot & Tethering.
- Toggle on Bluetooth tethering.
10. Check Your Receiving Device
If none of the above has worked, there may be a software or hardware issue with your receiving device. If possible, try to connect to another hotspot or Wi-Fi connection to verify that the device is working properly. Alternatively, see if another device such as a laptop or other phone can connect to the hotspot.
If it can, the issue likely lies with the receiving device. You can factory reset your phone to refresh the software side of things completely. Factory resetting will delete all of your data, so ensure that you back this up beforehand.
To factory reset your phone:
- Open Settings.
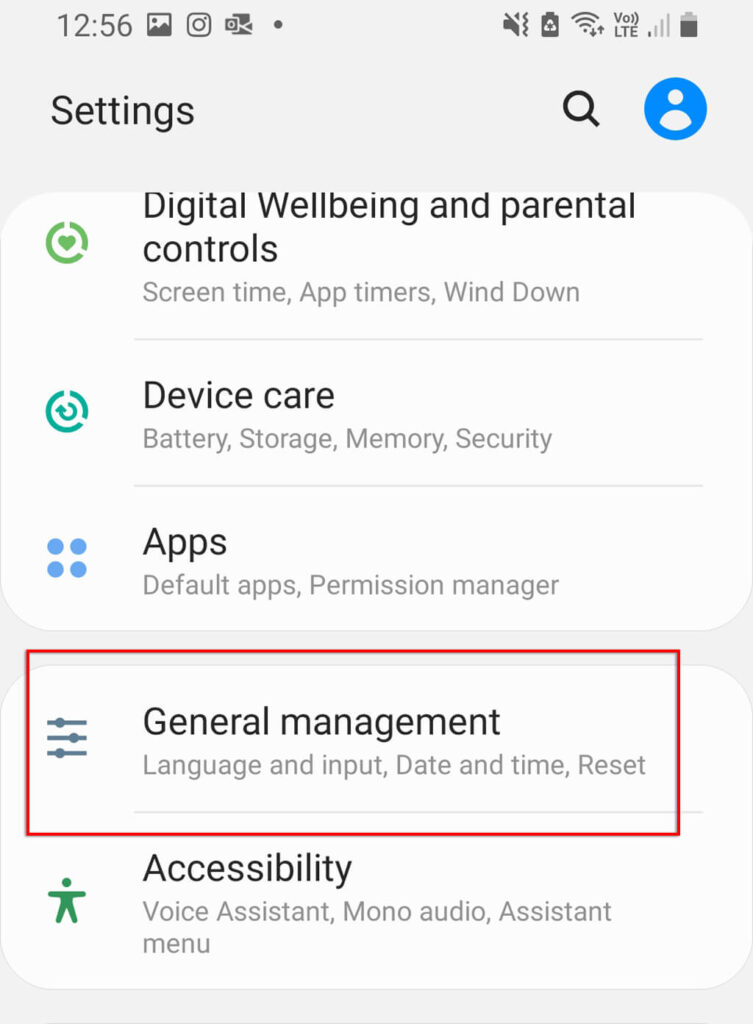
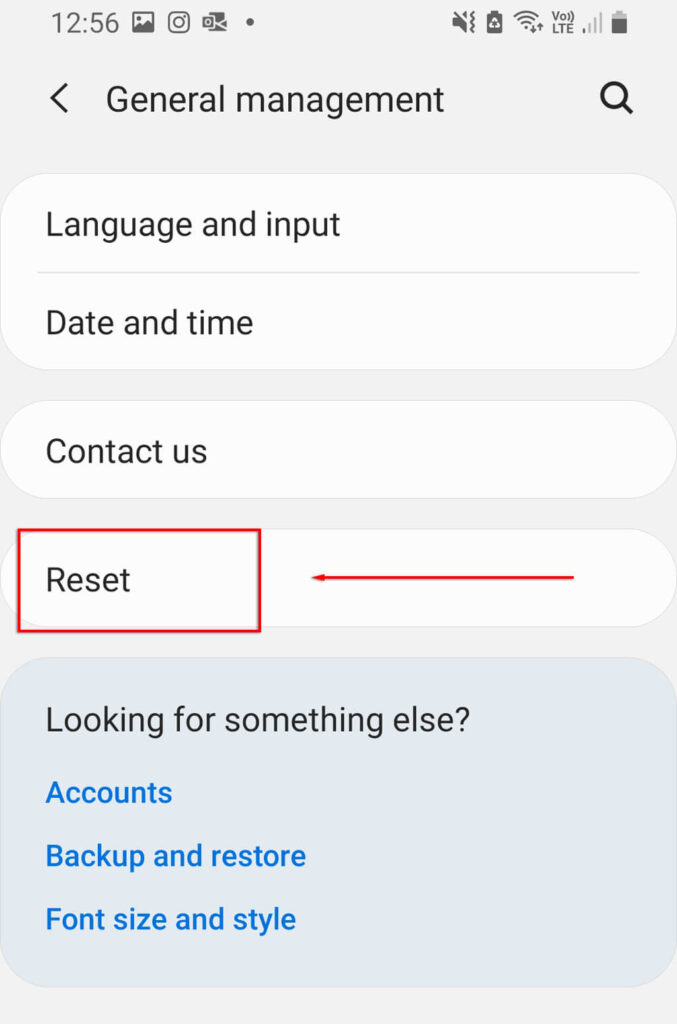
- Go to General Management.
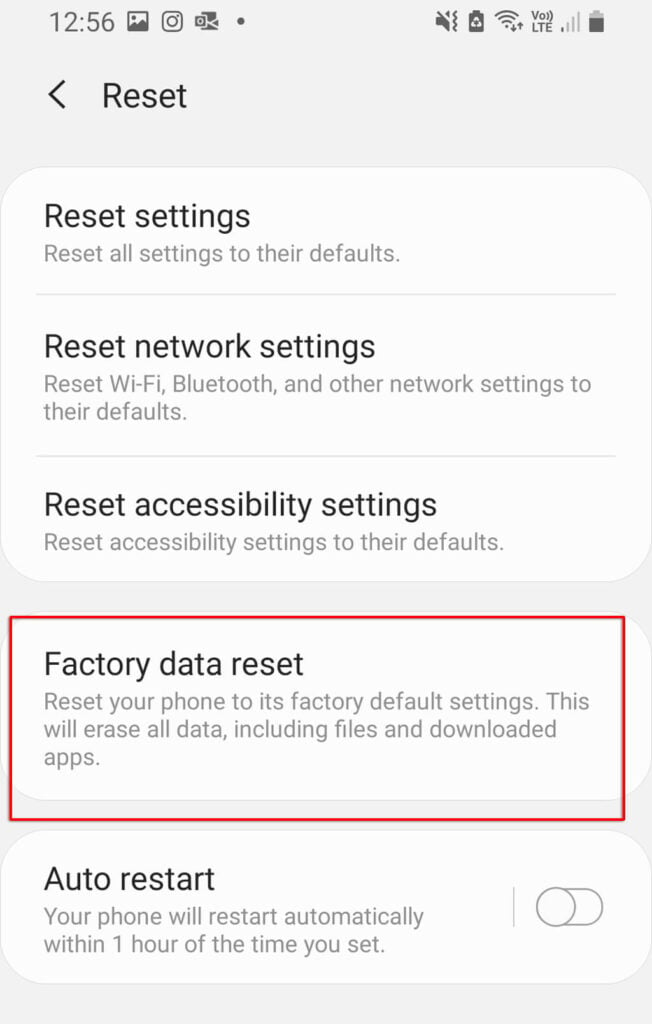
- Select Reset.
- Select Factory data reset.
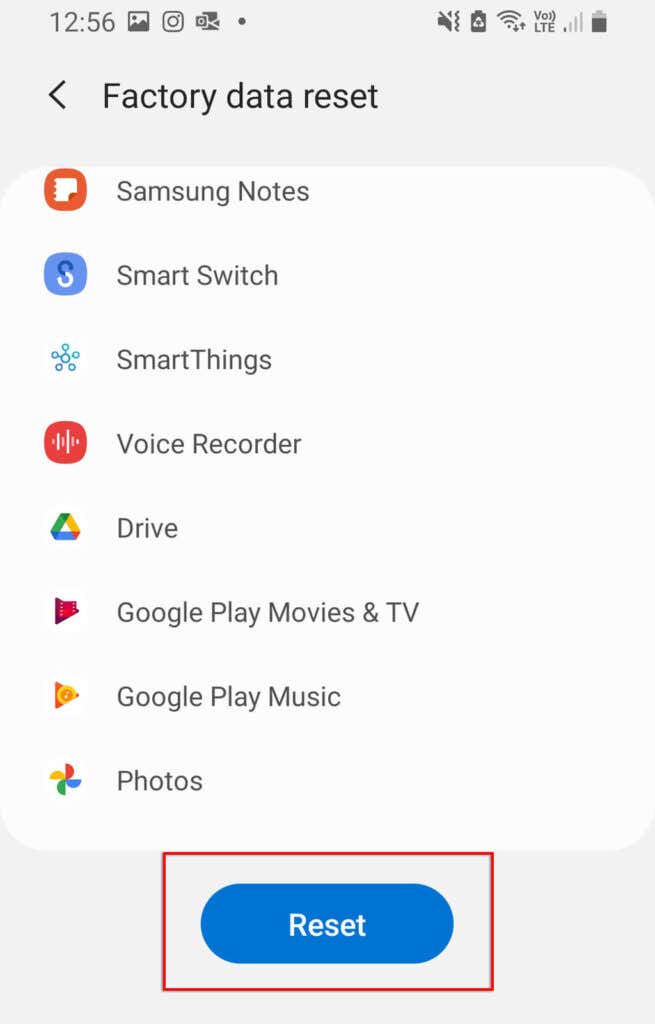
- Scroll down and select Reset.
Back Online
There’s nothing worse than having no internet, especially if you need to work or contact someone urgently. Hopefully, one of our solutions fixed your hotspot not working problem. If not, it’s likely a hardware issue, and you’ll need to take it to your closest repair center (and hopefully get a free replacement!).
If this article helped you, or you have another fix, let us know in the comments below!

